
Back to the Introduction to Overcast Sewing
Back
to the "Projects" Page
Home
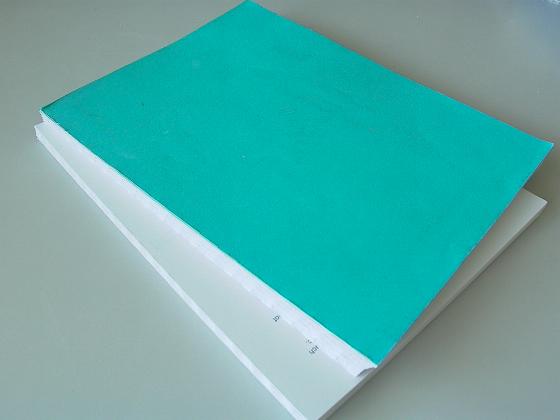
To avoid confusion, a single sheet will be referred to as a leaf or simply a sheet rather than a page. A page refers to one printed side of a leaf; thus, one leaf can have up to two pages: the front and back. The process of overcast sewing involves building up the book, tearing it down, and rebuilding again. After printed material has been selected for sewing, ensure pages are in order and that there are no missing sheets. In the example below (left), a coil bound book with a soft paper cover was selected for rebinding into a leather-bound hardcover.
The coil was removed and the side with holes along its edge was trimmed to provide an almost even edge (above right). The entire stack can be trimmed all at once by plough cutting, or 6 to 10 sheets at a time by hand using an Exacto knife and a metal straightedge as a guide. Use the innermost edge of the holes as a guide and dont worry about the edge being perfectly even (but only IF the holes were even to start with). This step does not apply if you are binding unbound sheets, such as something fresh off the printer.
The leaves were then counted to ensure that the total number of sheets is a multiple of 8 or 16 (the traditional number of leaves per signature). If the number is not a multiple of 8 or 16, you can add blank sheets of matching paper or remove unnecessary leaves. Normally, Id add no more than two sheets to the front and four to the back. Then, two slightly thicker sheets (you may use colored paper if you wish) are added: one to the front and one to the back of the stack, and are NOT counted. These cover sheets are used to form the end-leaves of the book. Later, decorative paper (marbled, colored or patterned paper) will be glued on top of these outer sheets, so at this time, the cover sheets should be plain. In this example, the blue paper covers were reused as cover sheets and were not counted. If possible, addition of leaves should be done before trimming to ensure evenly sized sheets.
The stack was then knocked up as evenly as possible and placed down with two of its edges against vertical surfaces perpendicular to the table top, with the spine edge exposed. I used a shoe box and an electrical transformer as the walls, and the stack was placed on top of an old textbook with a shiny hardcover to protect the desktop while gluing (below left). A metal ruler was also placed along the spine edge, and a railroad spike plate was used to press the ruler down gently.
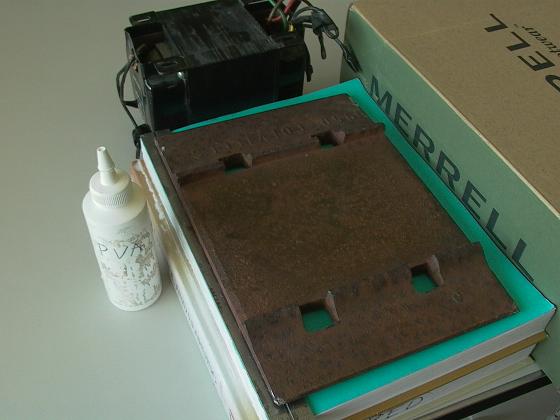
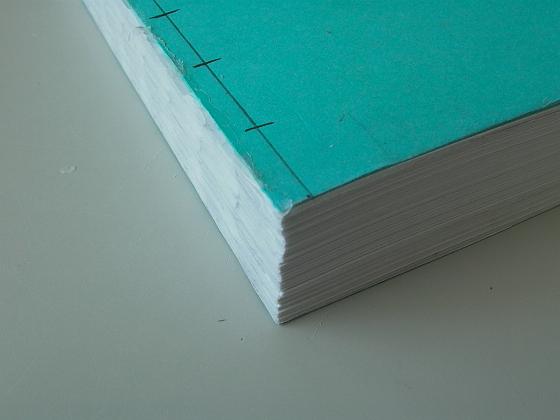
PVA glue (white glue) was smeared along the spine with a finger and allowed to dry (you can also use a paint brush). The stack was then removed from its objects and a line 1/8 from the edge was drawn along the spine side of the text block (above right). The line should be between 1/8 (2/16) to 3/16 from the edge. The line was then marked for drilling at ¾ intervals, with about ¾ or more at the top and bottom between the edges and terminal points. For 8.5 by 11 sheets, I normally mark 14 points with 5/8 of space between top/bottom edges and their corresponding terminal points (points are still ¾ apart).
Note: There is a popular myth that PVA glue is
non-acidic, which is NOT true. Elmers Glue-All and School
Glue, both of which are popular PVA glues are acidic (pH of 5 and 4 respectively)
and should NOT be used for archival projects. If this project
is to be archival, be sure to use white glue labeled as acid-free, archival
quality or similar.
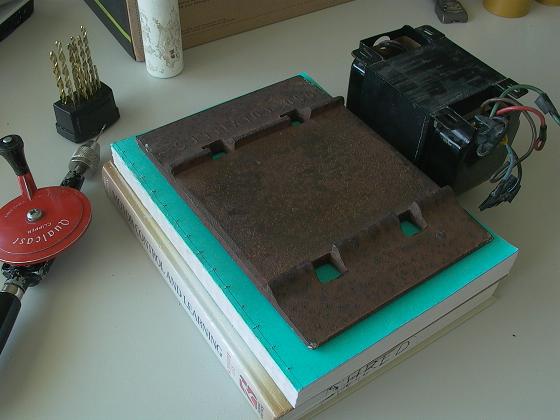
The text block was then placed down flat on top
of the junked text book (to protect the table while drilling) and the fore-edge
(edge of stack opposite the spine edge) was knocked flat and even on a
vertical surface perpendicular to the tabletop (the textbook in this case).
A wide area weight (in this example, a railroad spike plate) was used to
press down the stack to hold in place, being careful not to cover up the
marked line. The book was drilled at the marked points using a 1/16
drill bit. Be sure to hold the drill as straight as possible.
If using a hand drill, the hole will invariably angle off no matter how
straight the drill is held; a drill press with a guide may solve the problem.
Angled holes, however, can be used to your advantage during sewing (explained
later). Even so, holes should be drilled as straight as possible
as angling will occur to some extent so be sure to readjust the stack as
necessary as you drill.
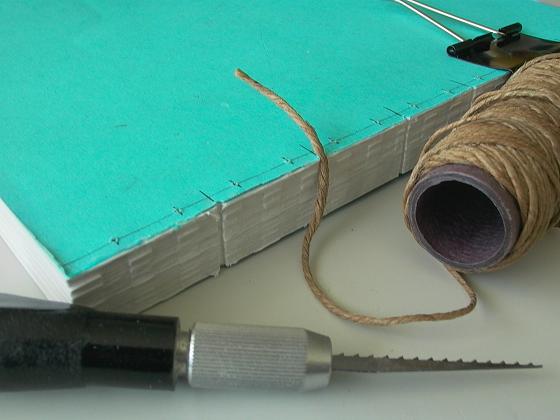
After holes are drilled, type of support for the spine must be selected: either cord or cloth tape. Cloth tape is more common and very popular with many bookbinders, but cord was chosen for this example, and jute twine about 1/16 diameter was used (leather bound books made before the 20th century were almost always sewn on cords). Unbleached common household twines made of either hemp or jute may be used, and are available at any hardware or department store; look for the best quality hemp or jute twine you can find. If you prefer to use tape, linen tapes made especially for bookbinding are available from art supply stores. Also, some commercial binderies are authorized to sell materials so be sure to check your phone directory for local listings. Ordinary ¼ sewing tapes made of white or unbleached cloth may be also used and are available from dollar stores.
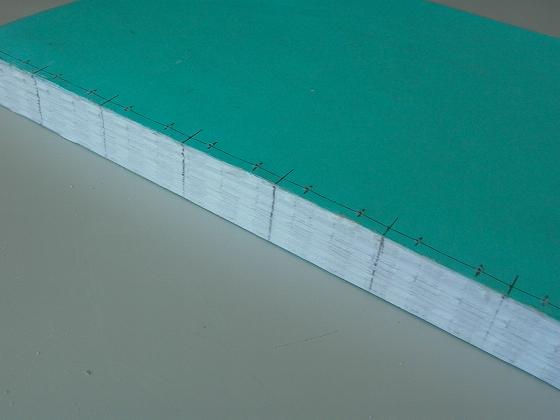
Because the cords will be recessed into the spine
as they cross it, grooves were cut in the spine (above left and right).
This step does not apply if you are sewing onto cloth tapes. The
spine was first marked with a square. Then the text block was held
in a vise and cut with a saw. The channels should be deep enough
to recess at least ¾ the cord (diameter-wise), but no deeper than
the diameter of the twine. Grooves were cut between drilled points
at every two or three sections. For an 8.5 by 11 text block, I normally
use six cords (thus, six grooves), though four is enough for a book of
that size. Also, I like to space the grooves evenly apart, with equal
spacing between terminal grooves and top/bottom edges (see text blocks
below).
Six pieces of twine were then cut. The length should be thickness of text block plus a few inches on BOTH sides (above right).
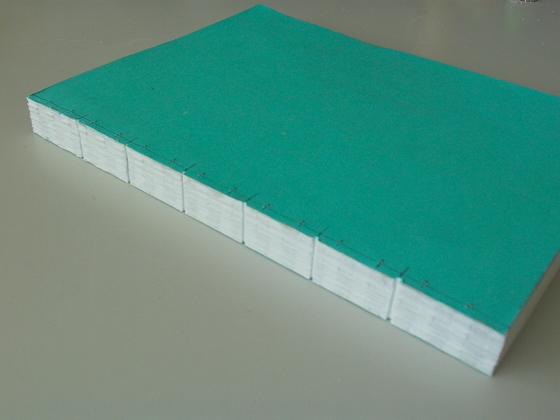
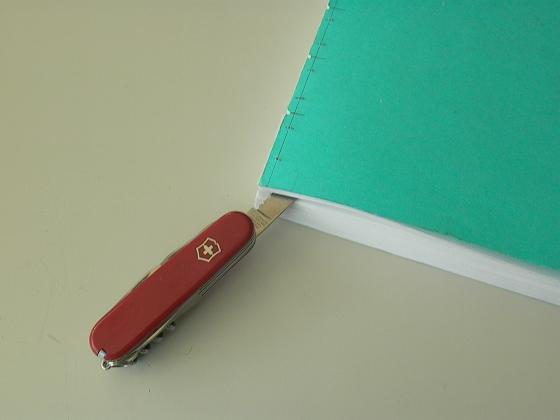
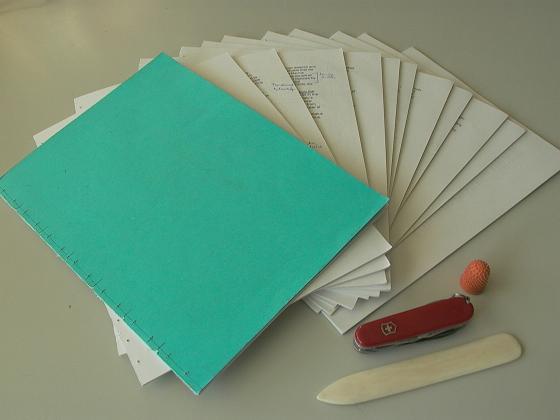
The book was then torn apart into 16 leaf sections (8 for text blocks with thicker leaves) not counting the cover sheets (with cover sheets, first and last sections have 17 leaves). Count up the leaves, and tear them out all at once together as a group and keep them together (below right) in the original order. Sections may be removed like sheets from a notepad or a knife may be used to reduce the chances of peeling the paper.
Next Step: Whip Stitching
the Text Block
Back to the Introduction
to Overcast Sewing
Back
to the "Projects" Page
Home
Created on: October 16, 2009
Copyright (c) 2009 Alvenh
Channe.