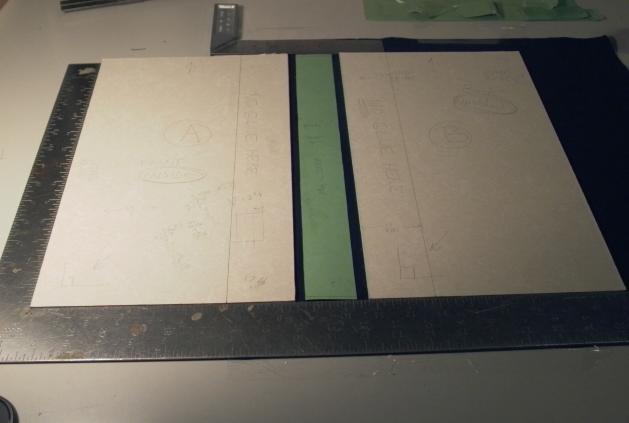
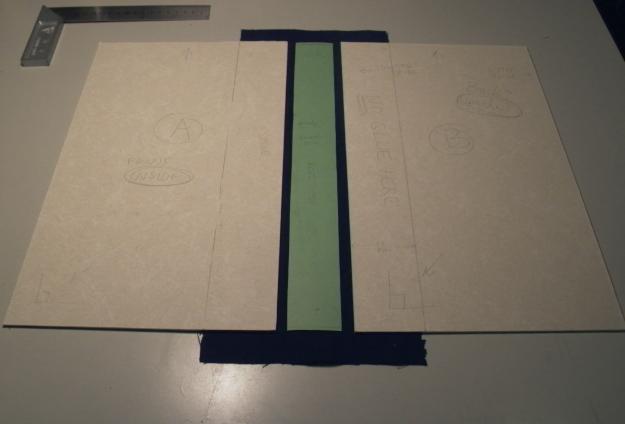
To make the book cover, boards and spine needed to be assembled into a single unit. The cover pieces were aligned with a square (below left), and gaps between the spine and the boards should be somewhere between two (2) to three (3) cover thickness wide. Temporary masking tape was used to hold the pieces in place.
A covering material was then selected for the cover. You can use wallpaper, vinyl wrapping sheets, gift wrapping paper, decorative scrapbook paper, etc. Instead of using one material for the entire cover, I used cloth from an old tea towel (purchased at a Salvation Army thrift store) for the spine and part of the cover close to the spine, and a different material for the rest of the cover. I wanted to use old-fashioned marbled paper, but the process of making it is rather messy, so I opted for a marble print vinyl wrapping sheet. I do not recommend binding in leather if this is your first bookbinding project. Trust me.
If you are covering the cover with one type of material, you will need to cut a sheet large enough to cover the entire unit pictured above with 1 of overhang around the entire unit. If you are binding with more than one material, begin with the spine, leaving 1 of tail on the top and bottom (below left). If the covering material isnt already self adhesive, use PVA paste (i.e. white glue) to glue it down. Spread glue evenly on one side of the spine and area of cover board onto which youre gluing. Be sure to check with a carpenters square to ensure the boards are still in alignment and remove temporary masking tape when glue has dried. Fold tails over and glue (blow right).

The rest of the boards were covered after the text block was attached, as this would allow marking with pencil, the border of the area to be covered with the text block.
Next
Step: Labeling and Shaping the Spine
Back to the Bookbinding Introduction Page
Back to Projects Page
Home
Created on: May 29, 2008
Copyright (c) 2008 Alvenh
Channe.