Single Sheet Bookbinding:
Step 3: Preparing the Whip Stitched Text Block for Binding
Back
to the "Projects" Page
Home
Back
to the "Projects" Page
Home
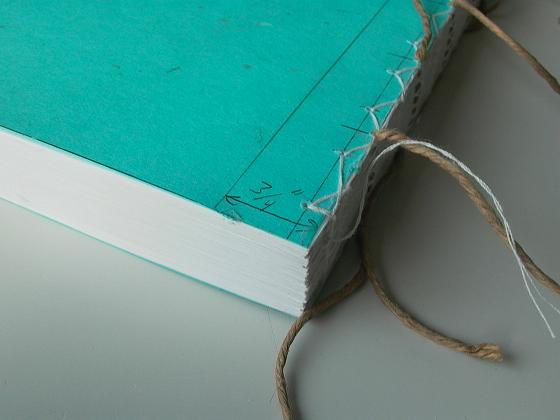
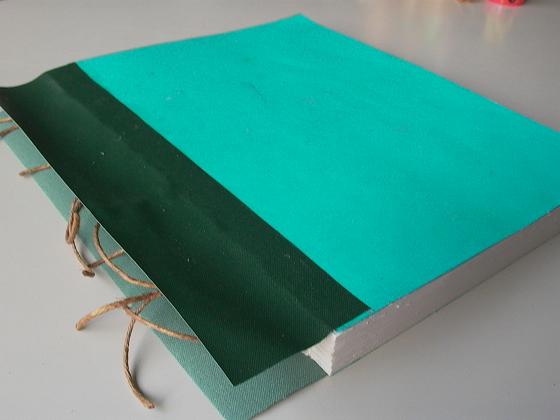
In order to bind the whip stitched text block, it must have something to allow the cover boards to attach to it, thus, cloth hinges were added. The cloth hinge may be unbleached muslin, cotton canvas, starched linen, or book cloth. In this example, buckram (a type of book cloth) was used for the hinges. First, a line ¾ from the spine edge was drawn along the cover sheets from top to bottom on both sides (below left). Two strips of buckram fabric 2.5 wide by height of text block were cut. Then, PVA glue was evenly spread along the surface between the line and the edge (below right) and the buckram was glued-on ¾ in from the edge giving a 1.25 wide flap overhanging the spine.
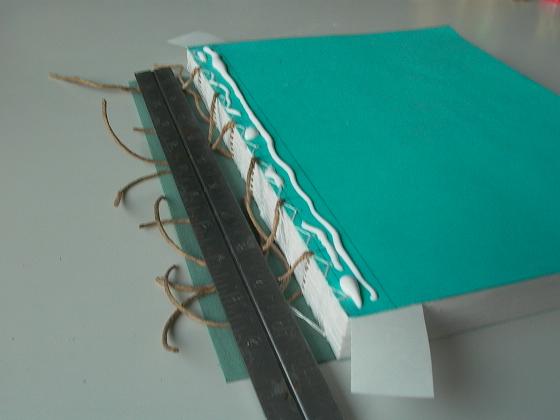
The procedure was then repeated for the other side (below). The excess twine (or cloth tape) protruding from both sides of the text block is also used for attachment of cover boards so DO NOT cut the twine until cover boards have been installed!
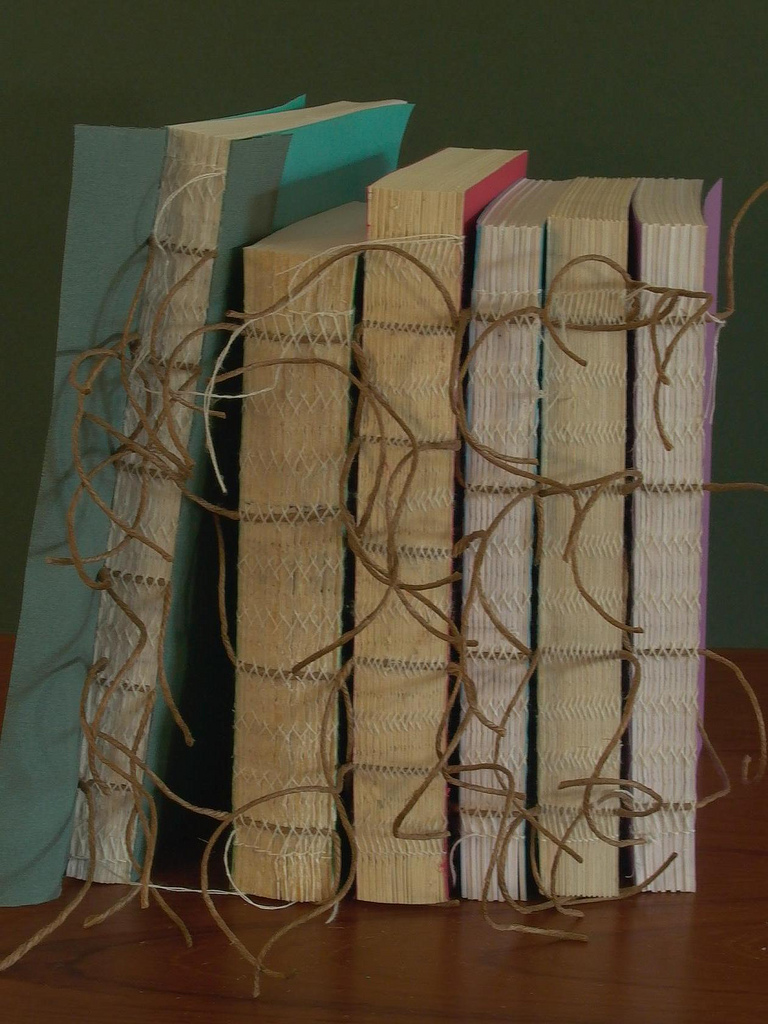
At this point, the overcast-sewn text block has
uneven edges on the top and bottom. Because of the alternating direction
of the tension in the threads, the unevenness forms grooved edges (top
and bottom) and will therefore have to be trimmed. Bookbinders use
plough cutters to trim edges; however, if do not have access to such equipment,
click
here to check out Bruce
Sparks method of plough cutting using ordinary tools that can be
purchased from your local hardware store. The top, bottom and fore-edges
of the text block were trimmed using this method.
After trimming, the spine of the text block was
rounded, glued and backed in the same manner as if it were composed of
folded signatures. When the glue on the spine was dry, edges (top,
bottom and fore-edge) were colored with acrylic paints. Text block
was gently pressed between two boards during painting to prevent paint
from seeping into the pages. Headbands were wound by hand separately
and then glued-on to the ends of the spine. At this point, the text
block is ready for binding using any method of hardcover binding of your
choice. You may choose to glue-on decorative paper to complete the
end-leaves either now at this point or later near completion of the project.
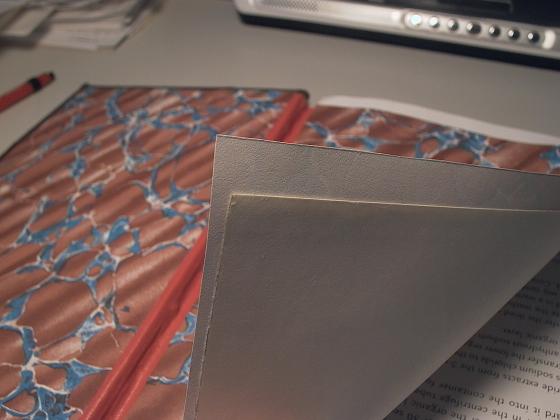
Below, is an example of a different book also sewn by whip stitching, in which the decorative papers were pasted to the end leaves near completion of the book. A sheet of marbled paper slightly larger than the cover sheet was cut with at least one straight side (to be aligned with the inner edge where the cloth joint sits). Glue or paste was evenly spread on the cover leaf and sheet was pasted down with ¼ of overlap on the cloth joint. Excess was then trimmed.
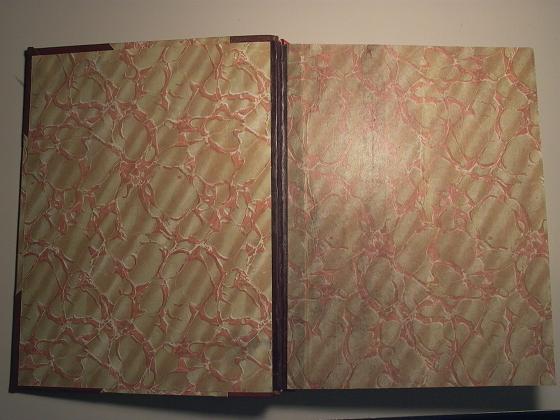
Below: Inside cover of another overcast sewn book. Note the exposed cloth (buckram) joint in the center.
If you have been directed to this article from
my original bookbinding (case binding) tutorial, click
here to resume reading.
Back to the Introduction
to Overcast Sewing
Back
to the "Projects" Page
Home
Created on: October 16, 2009
Copyright (c) 2009 Alvenh
Channe.