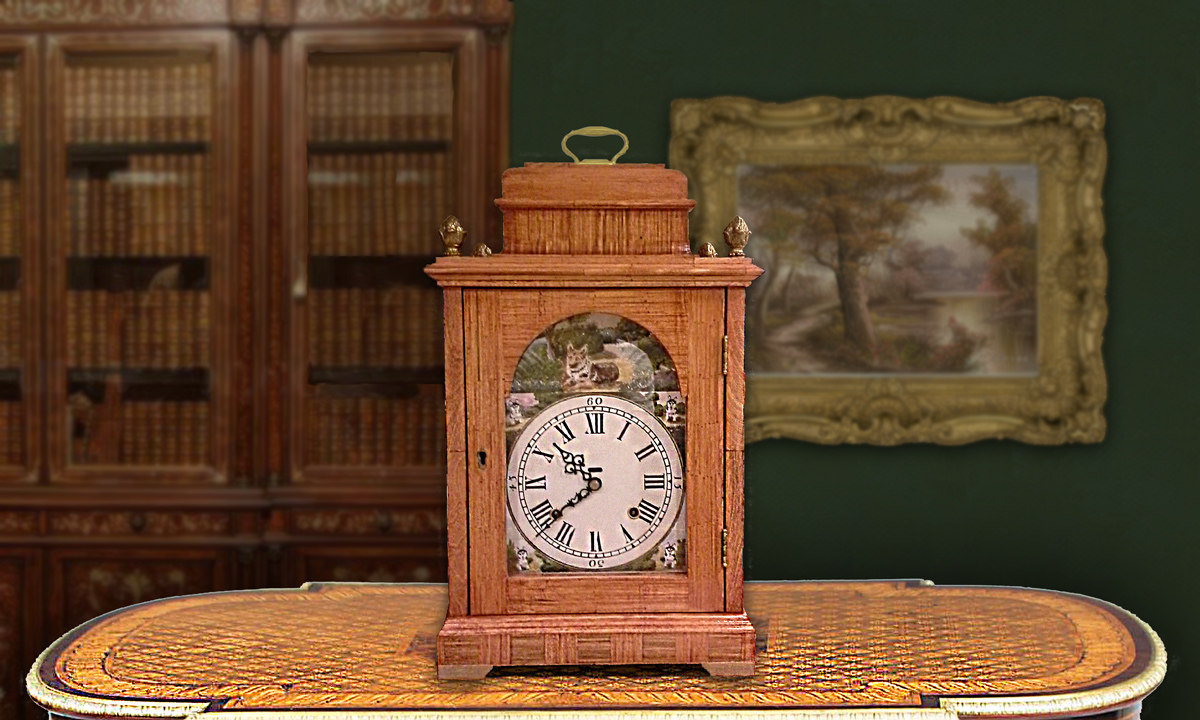
Making a Painted Clock Dial
Finally, this was the fun part I had been waiting for! This is where I can decorate a clock with any picture I wish using a painted dial.
While most Georgian bracket clocks have dials made of silvered brass or enamel, a few with painted dials decorated with scenery or seascapes do exist, although painted dials are more often found on longcase (grandfather) clocks of the late 1700’s to the mid 1800’s.
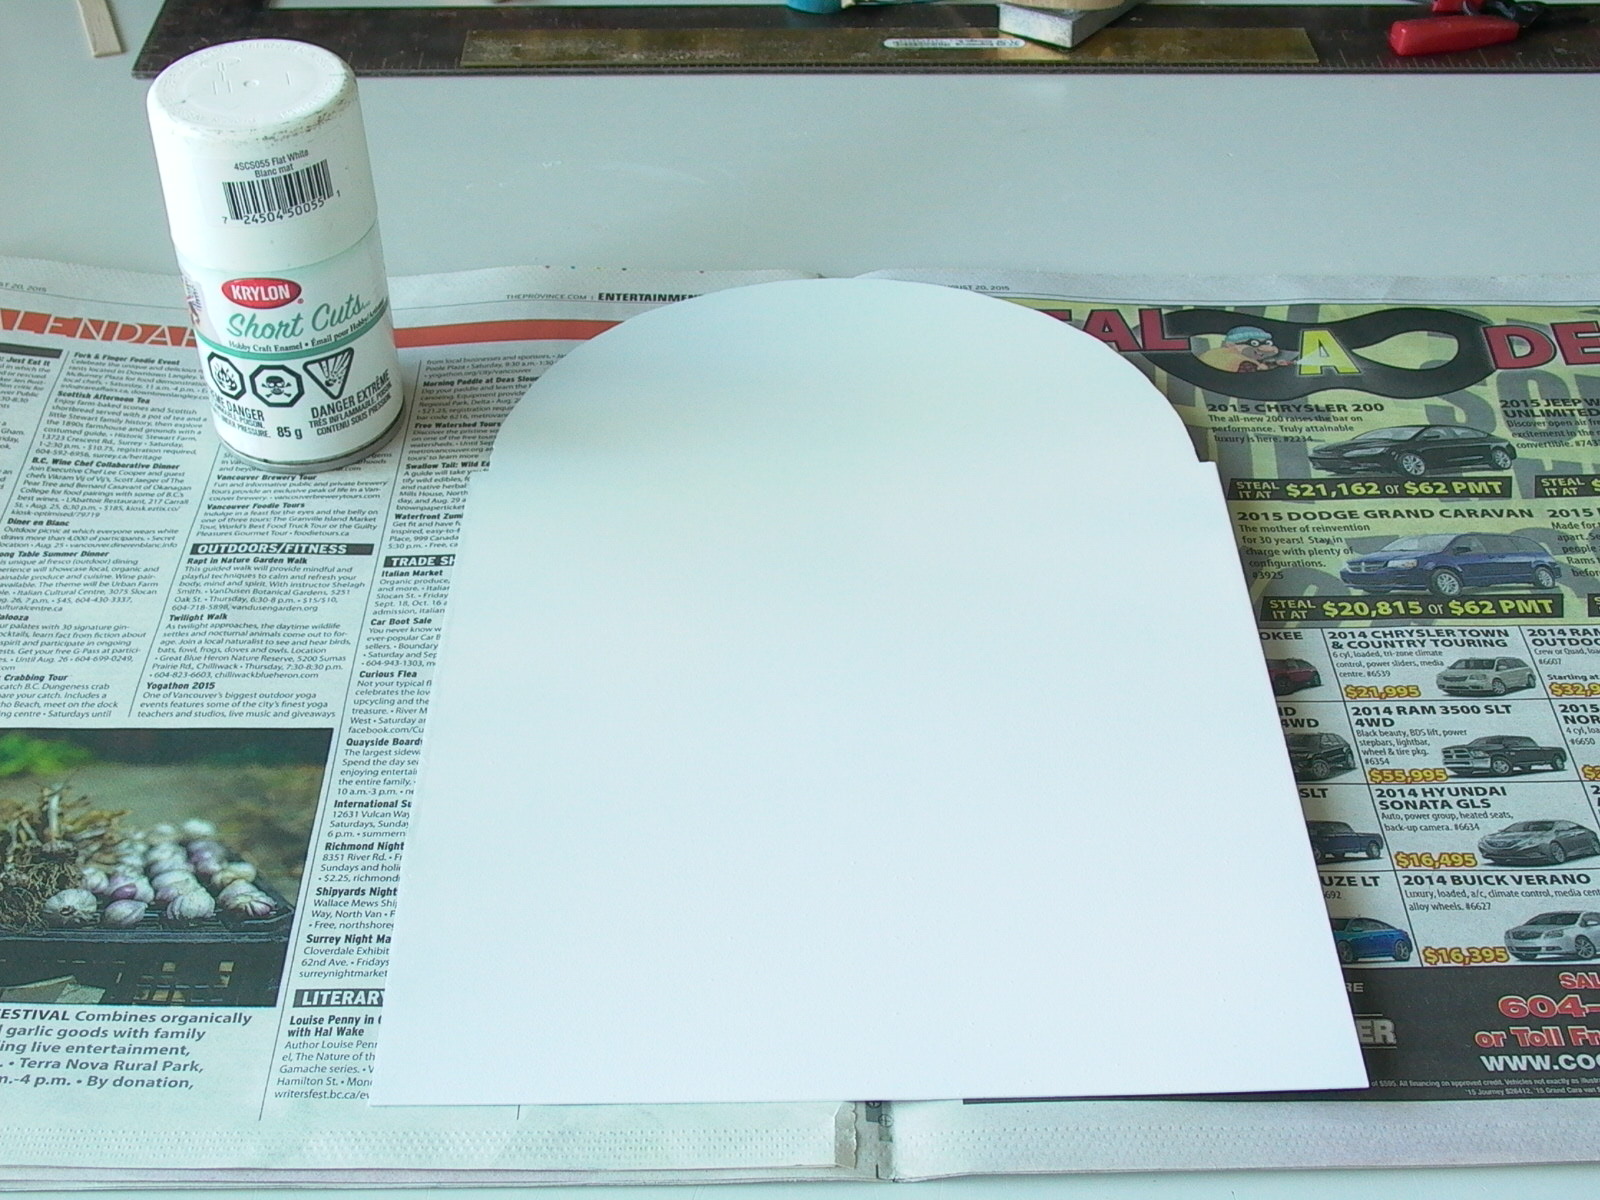
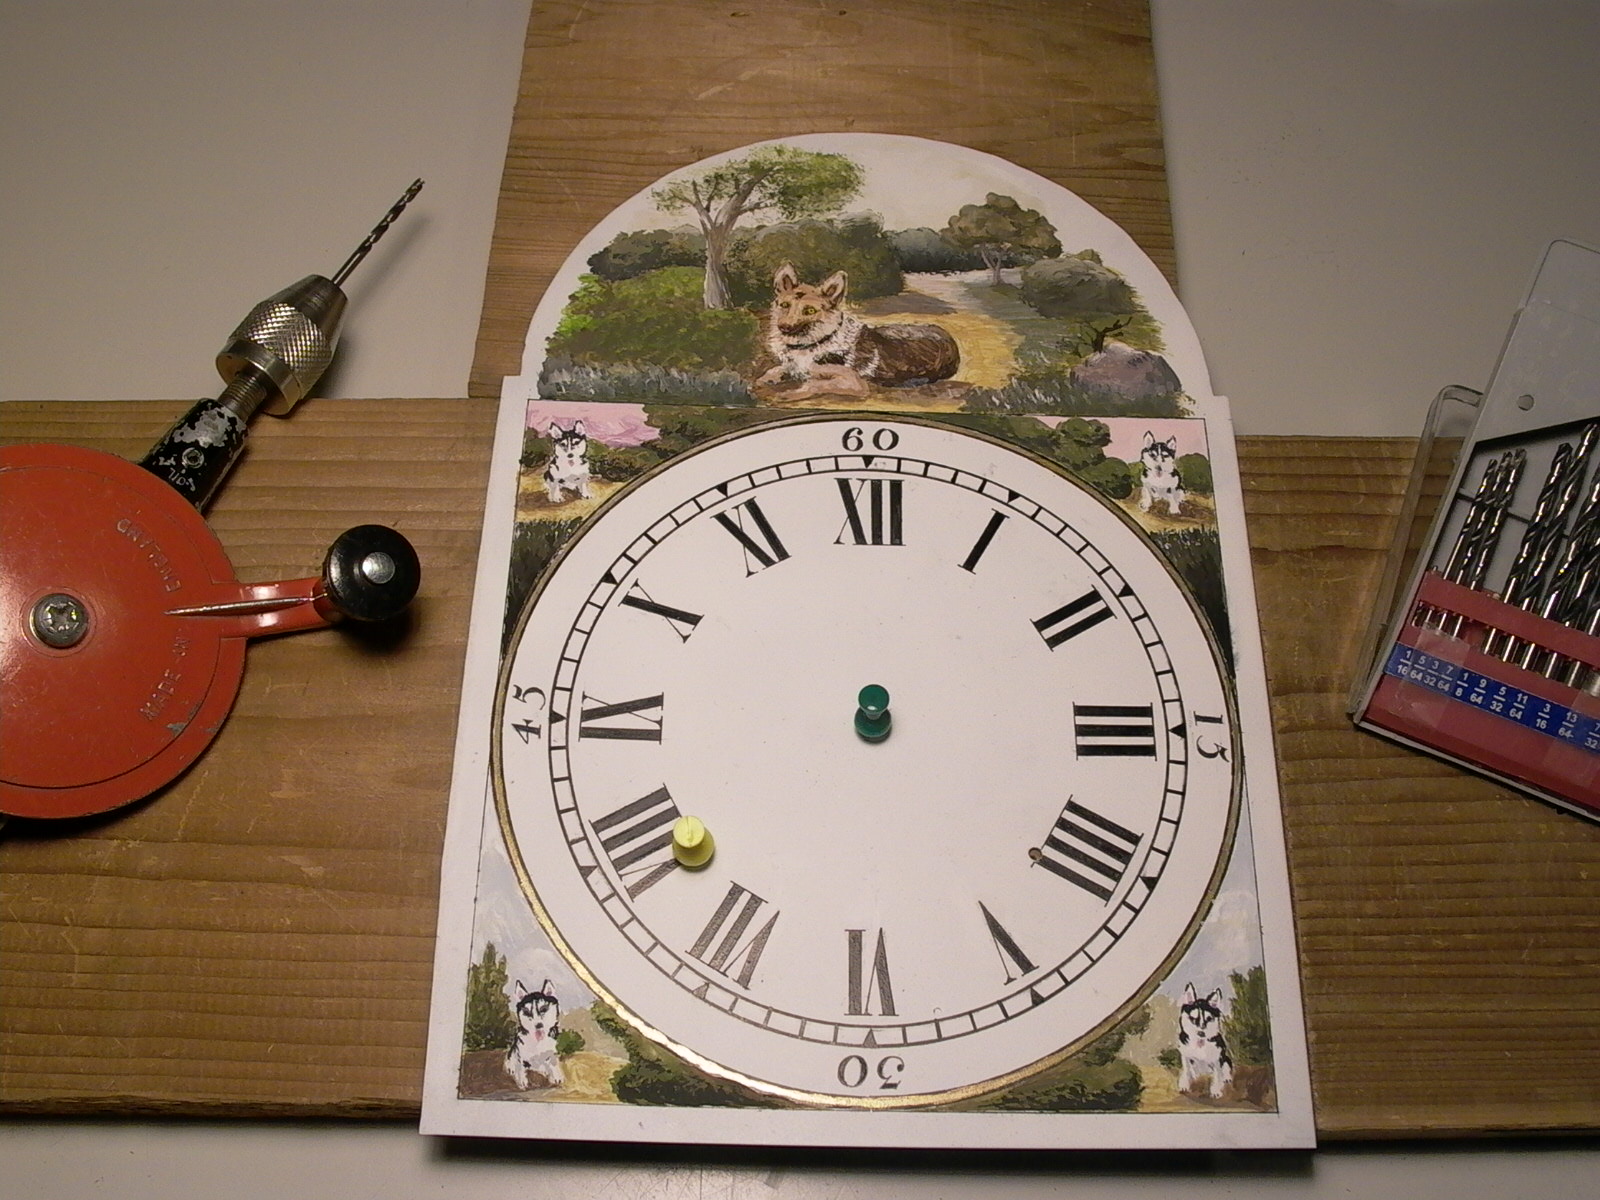
Painted dials were often done on steel, and I happened to have some scrap sheet steel lying around which were perfect for the purpose. The outline of the dial was marked on the sheet of steel with a pencil (fig. 170); for my clock, the dial portion was an 8” X 8” square with a 7.5” diameter semicircular arch on top but actual size used will depend on your design and size of the window of the front door.
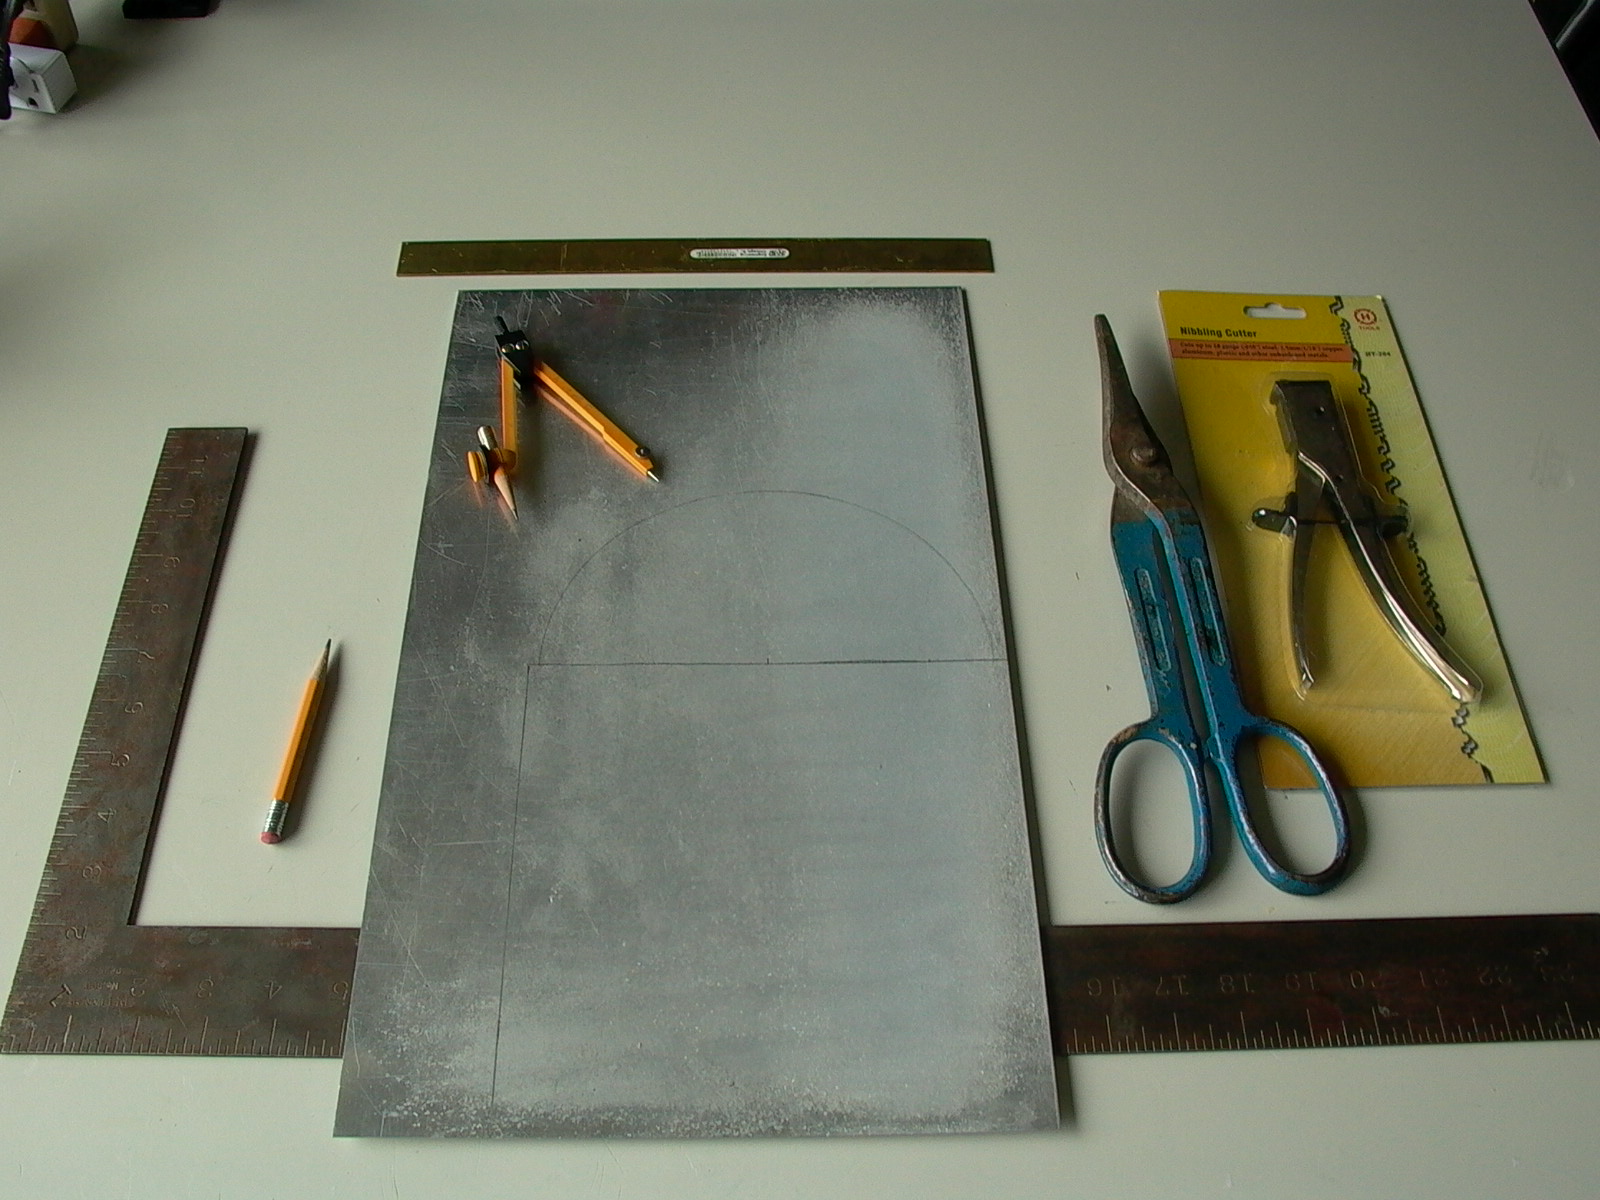
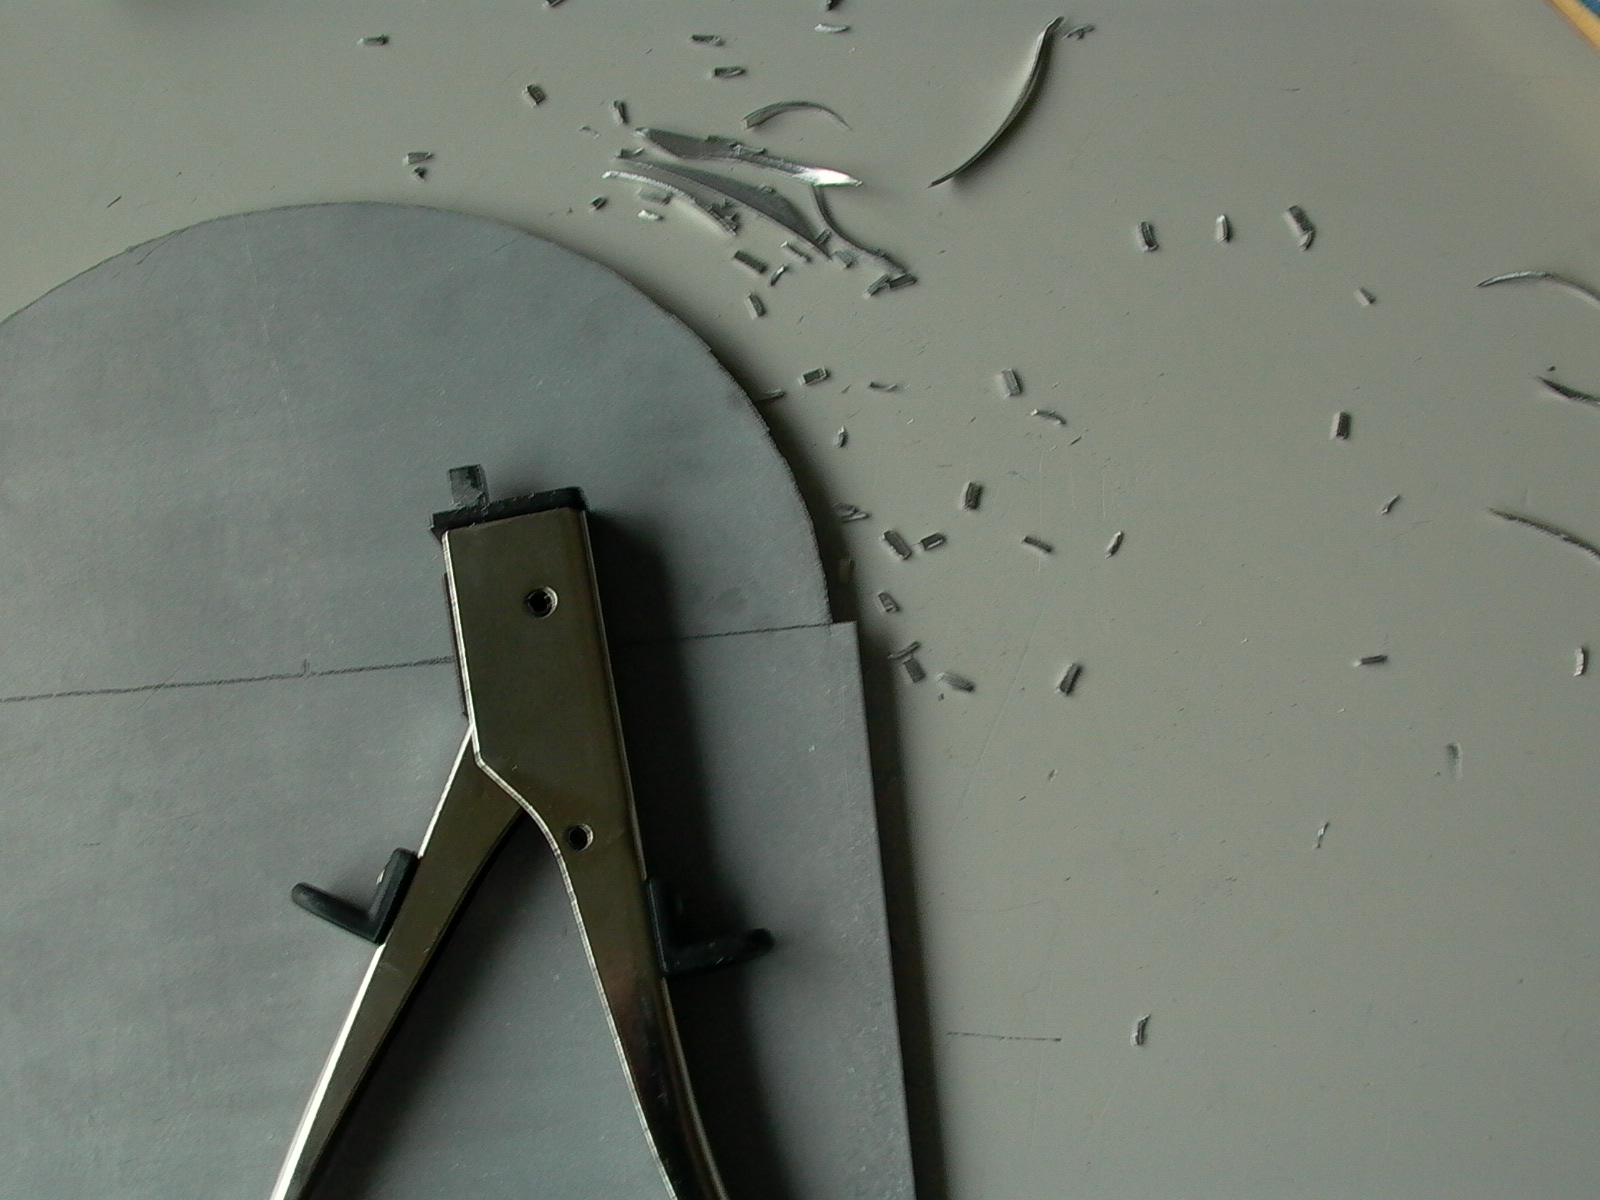
A pair of sheet metal cutting shears was used to cut the bottom portion and around the arch, leaving about a quarter inch of metal around the border of the arch (fig. 171). Nibblers were then used to “chew” away the excess metal around the arch right up to the border (fig. 172), and the edges were sanded to avoid getting cut by accident. (Note: Nibblers are available in electronic components stores)

One surface of the dial plate was cleaned with rubbing alcohol (so that paint does not stick to dirt or oil from fingerprints) and then sprayed with a few coats of Krylon Shortcuts flat white spray paint (fig. 173), which acts as a primer for ink and acrylic paints.
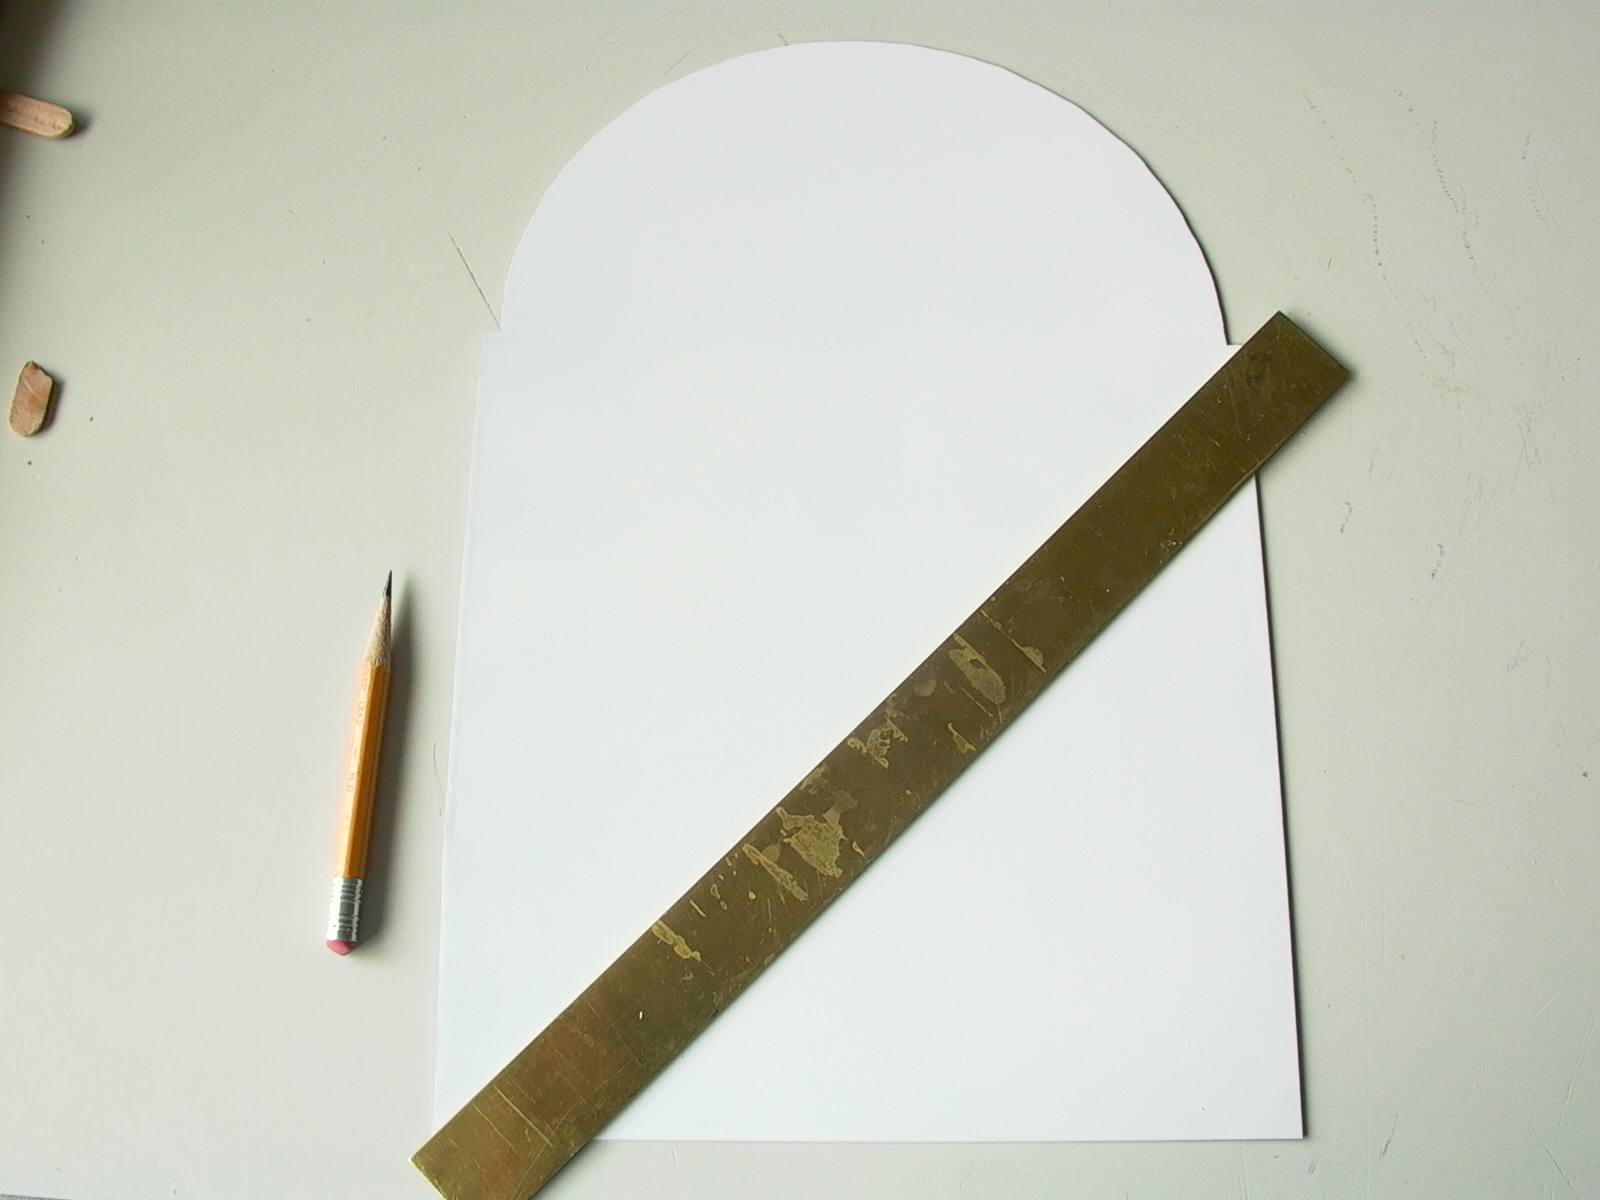
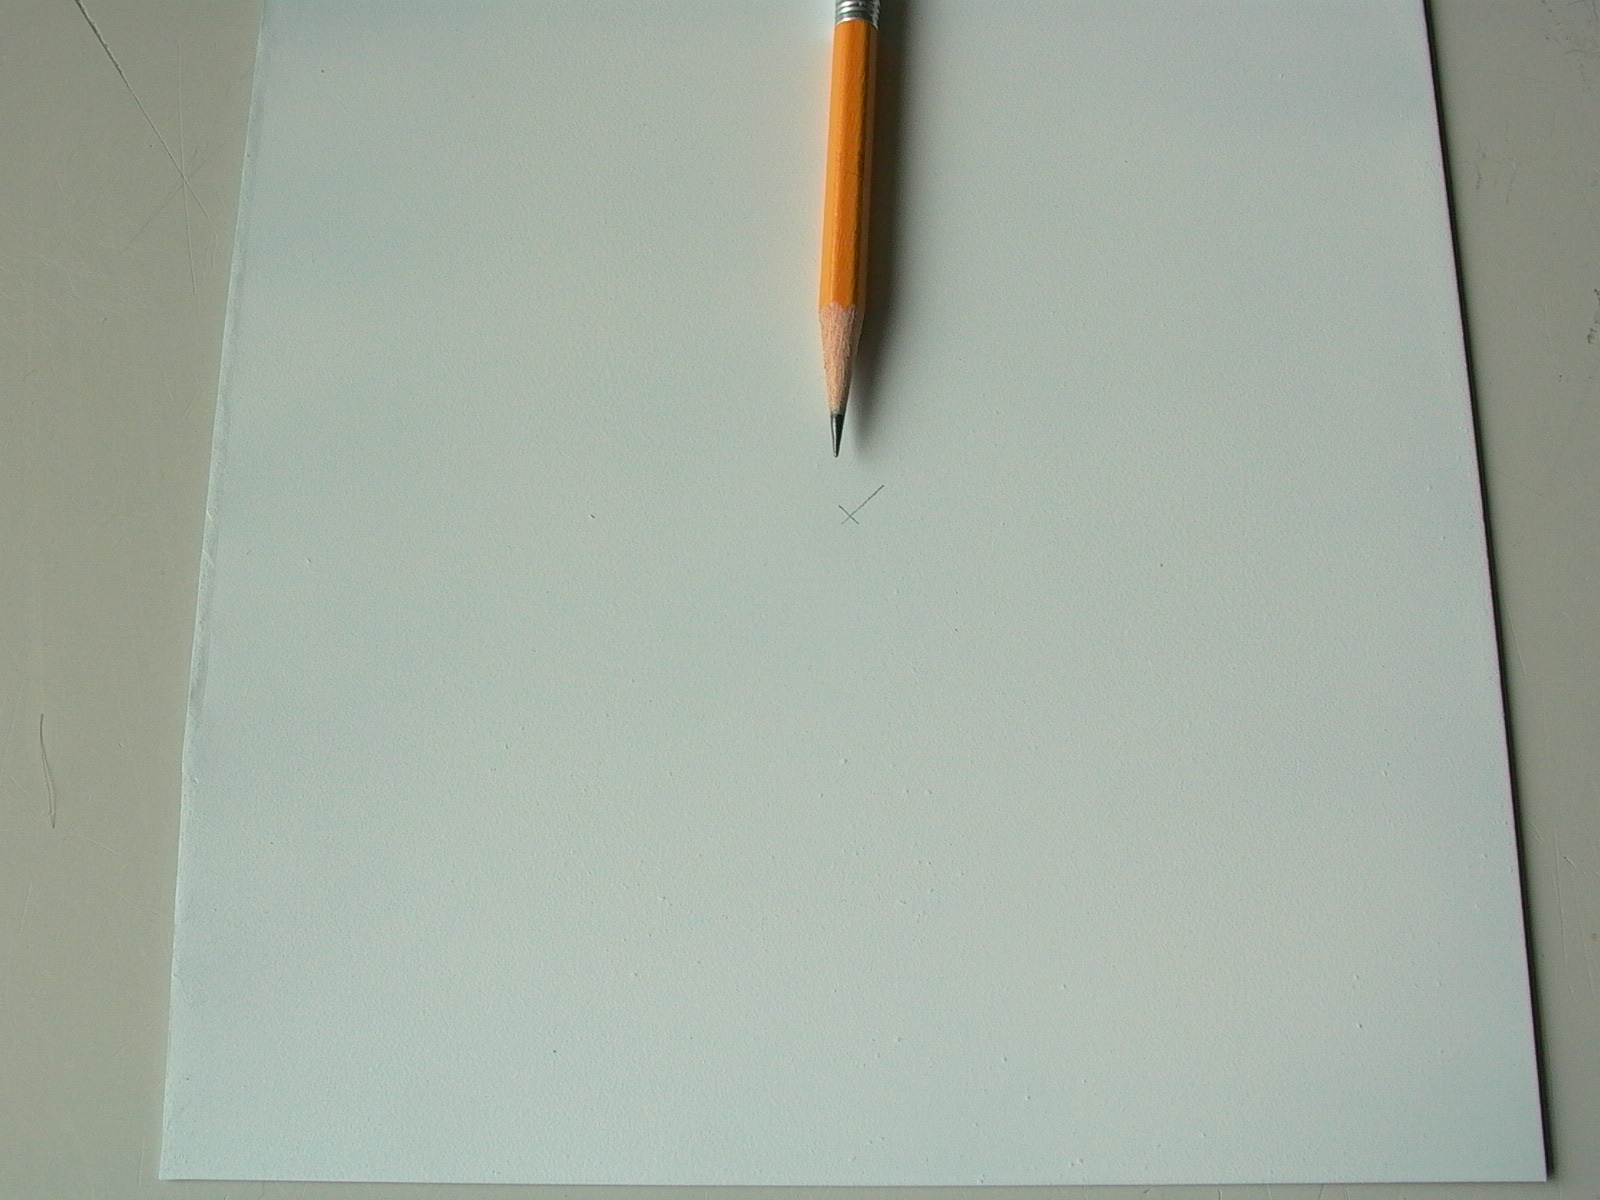
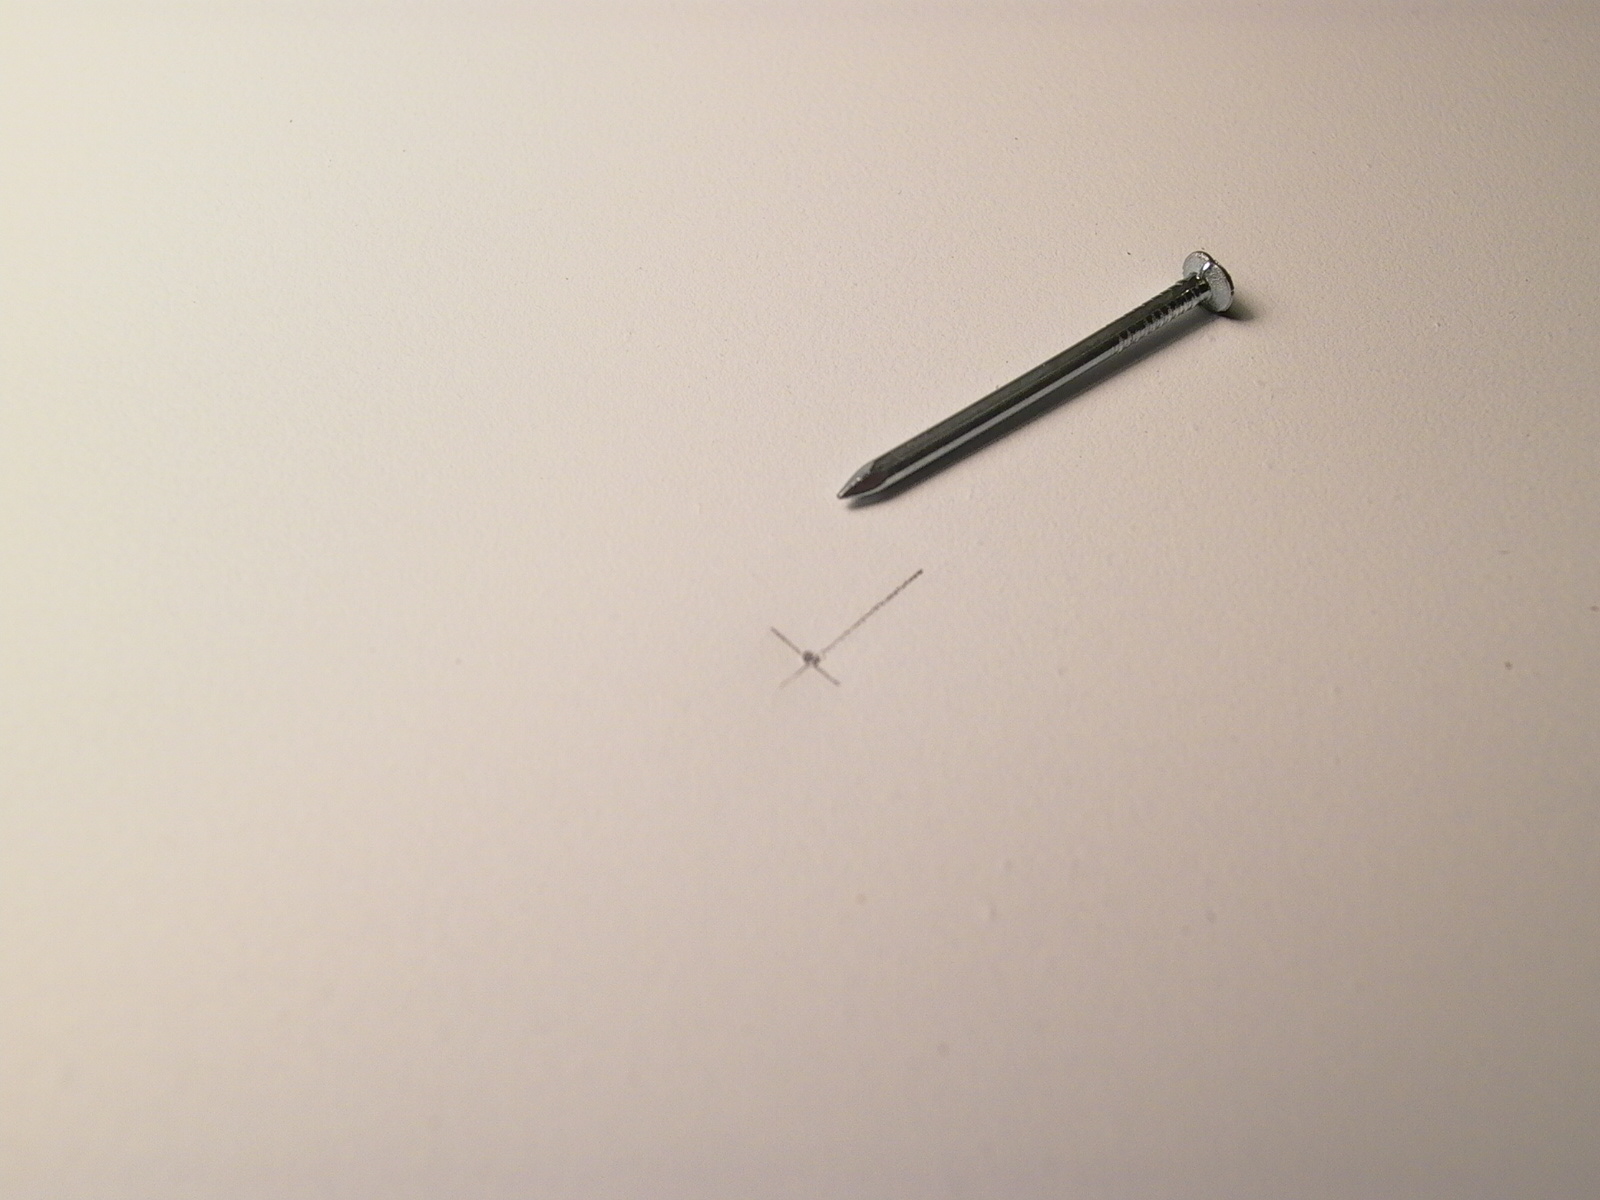
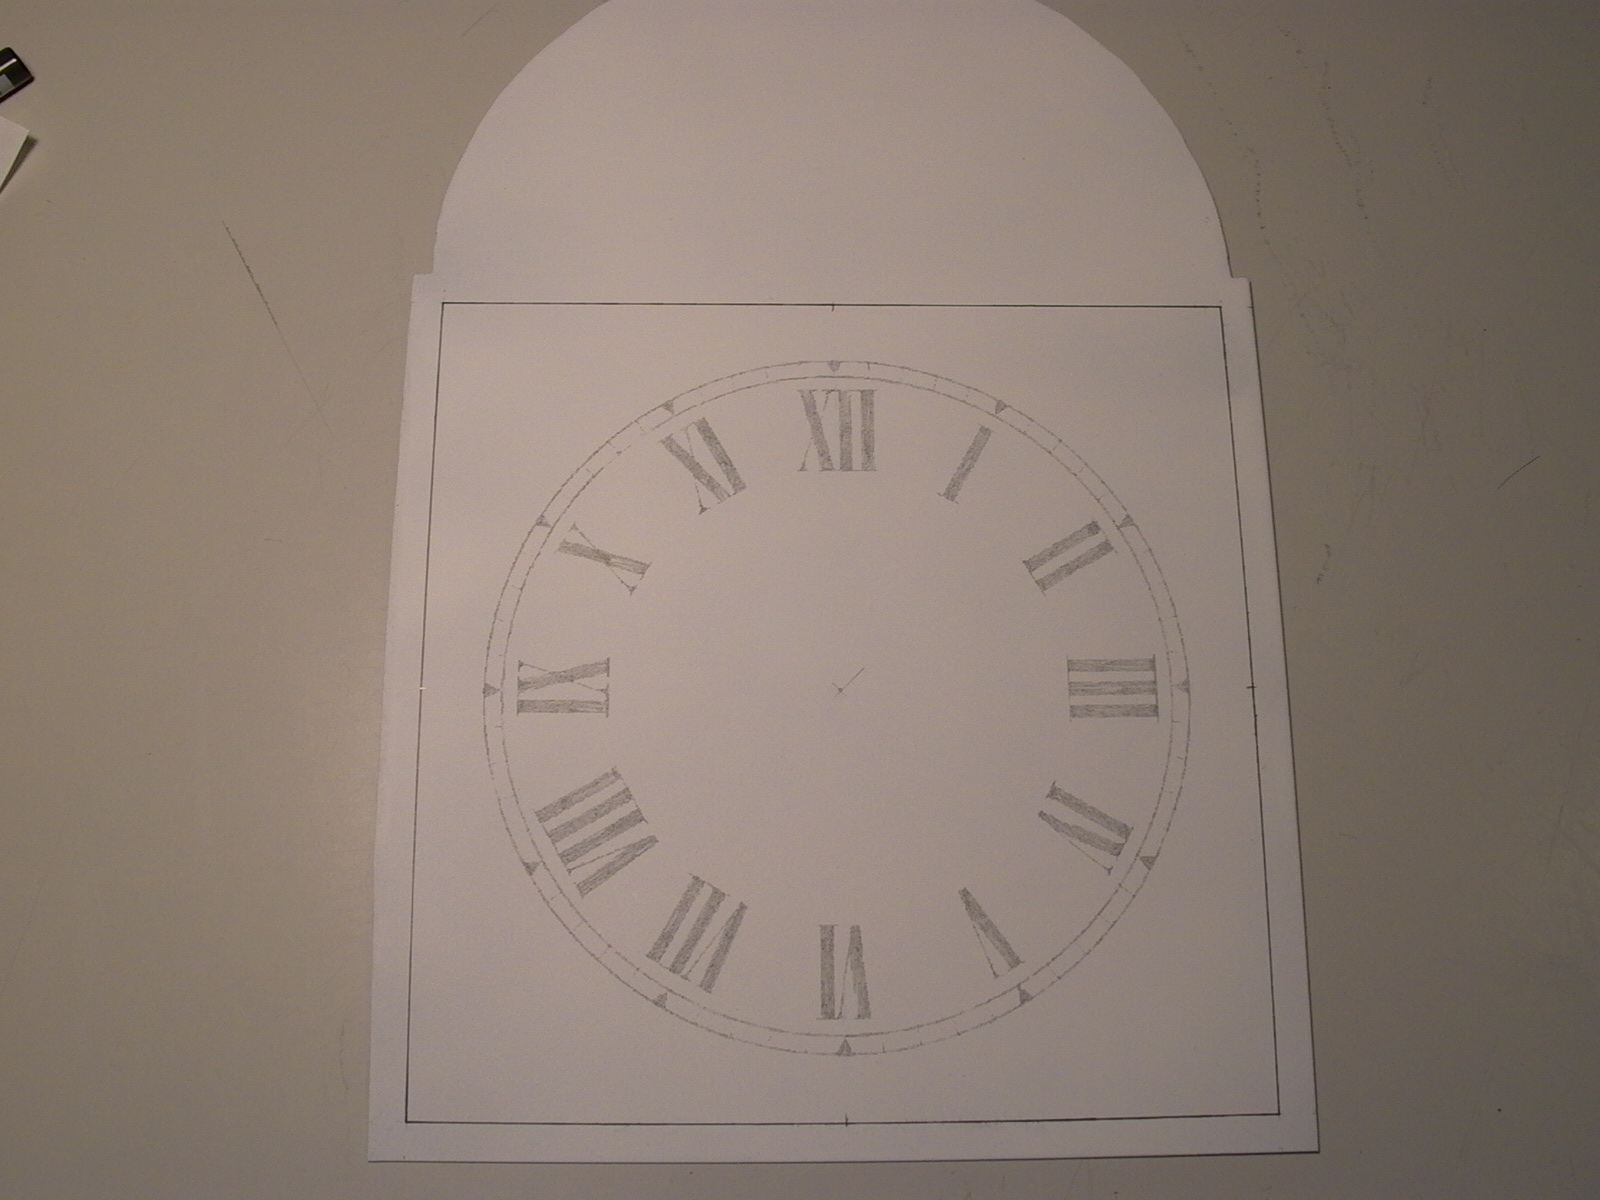
When the paint had dried, the center point was marked. To find the center, a straight edge was placed on the dial plate, connecting kitty corners (fig. 174). A guess was made as to the position of the center point between the corner and a line less than half an inch was drawn lightly in pencil, forming a ‘x’. The point of intersection is the center (fig. 175). A dent was then made in the center by placing a nail on it and giving it a single hit (fig. 176). A geometry compass will be used to draw the circular borders and number tracks of the dial and the dent in the center will help keep the compass perfectly in place.
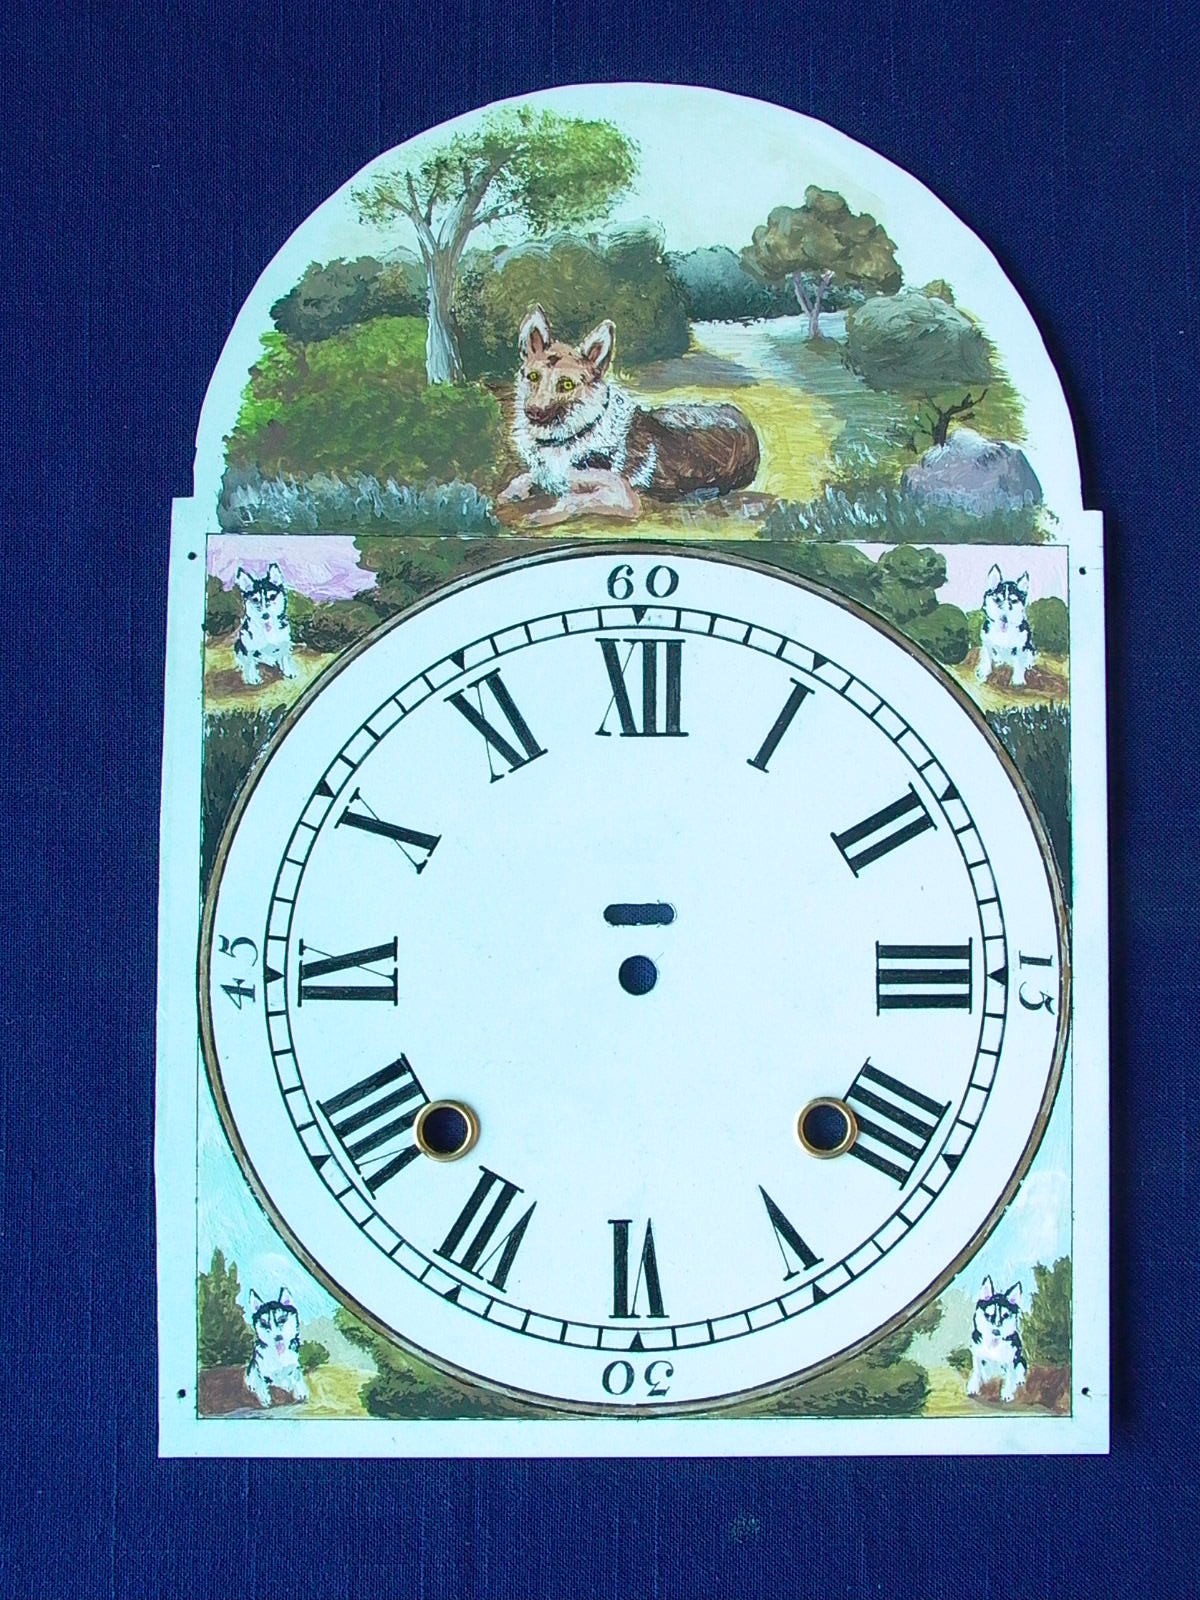
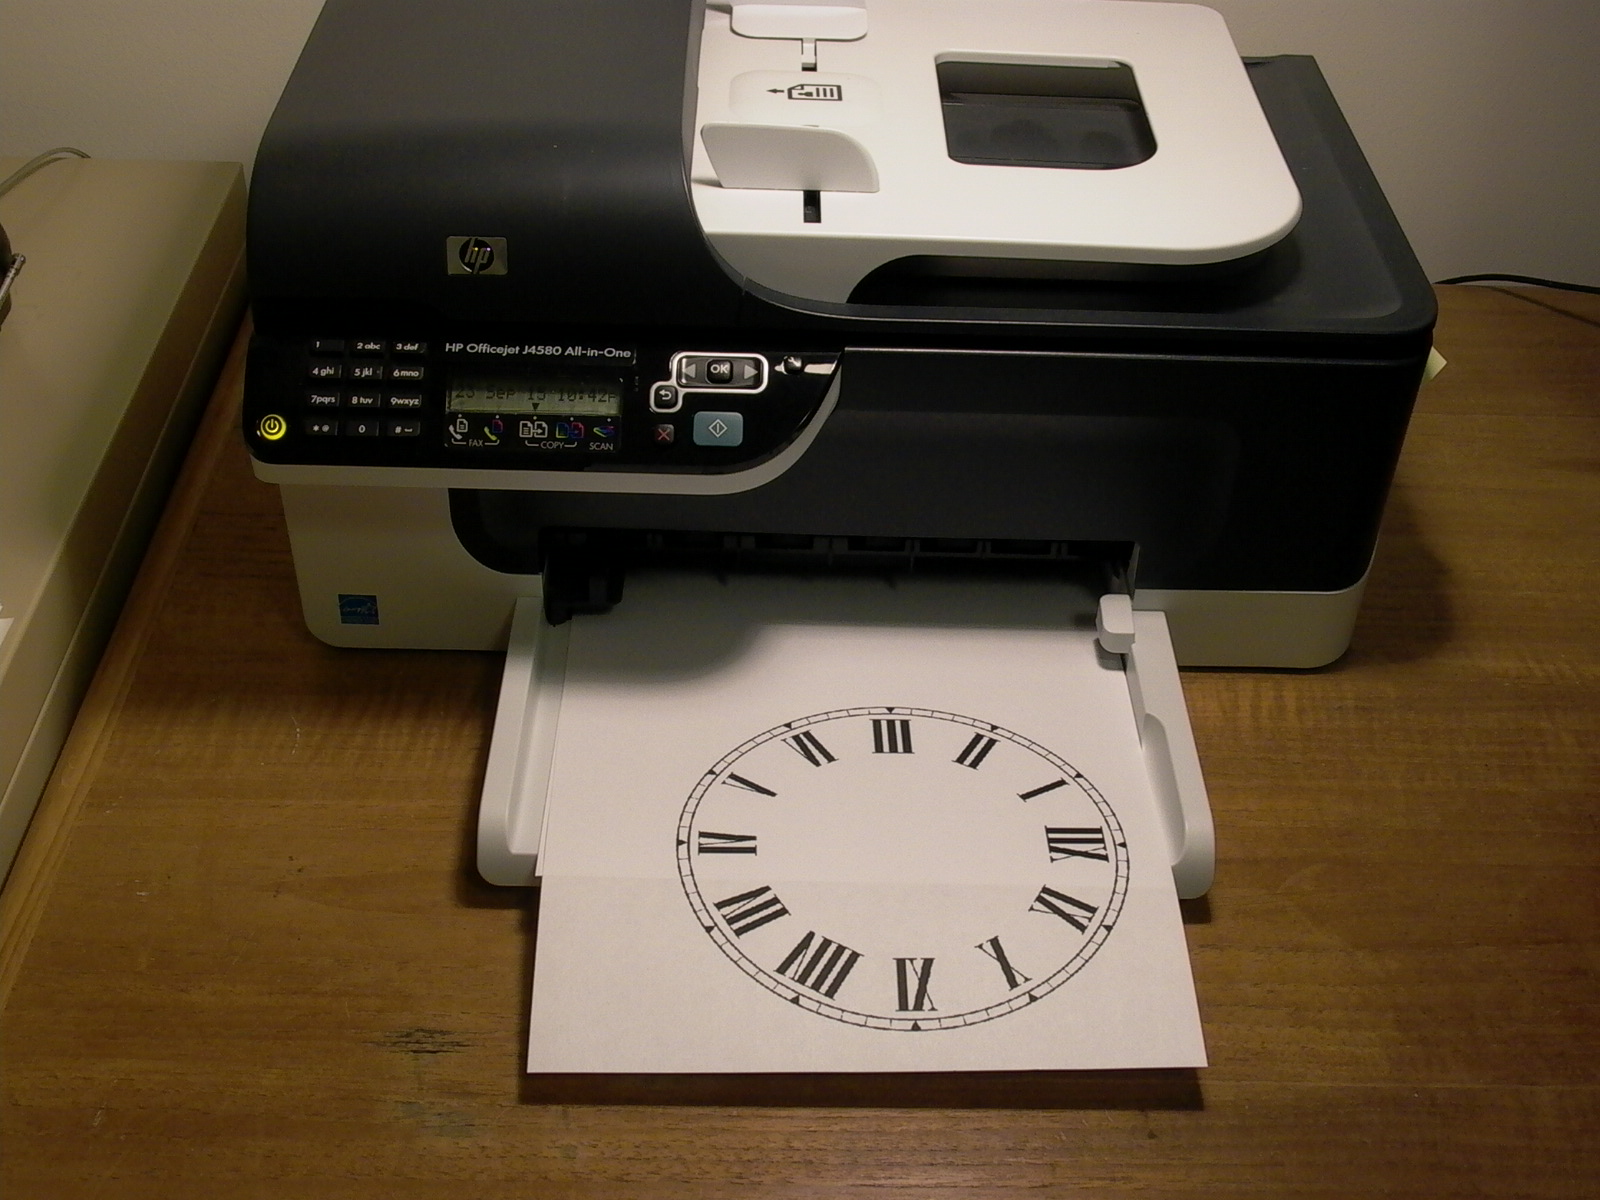
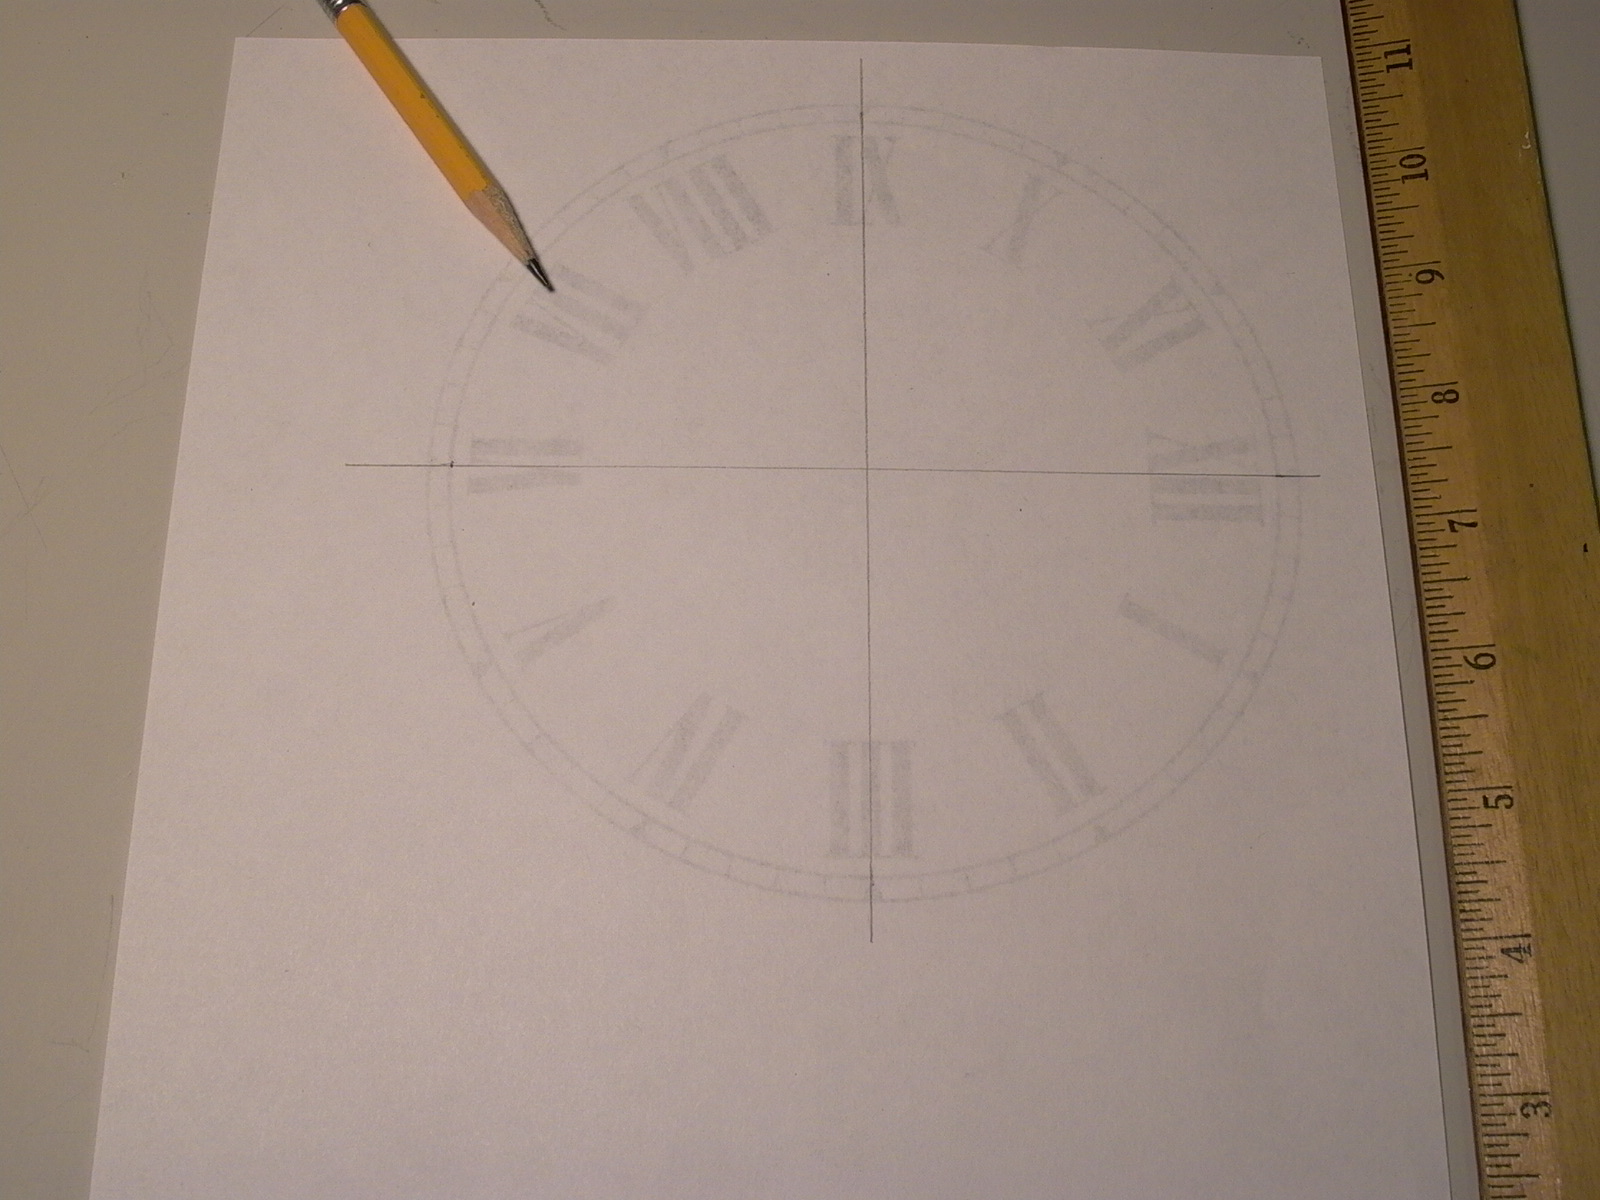
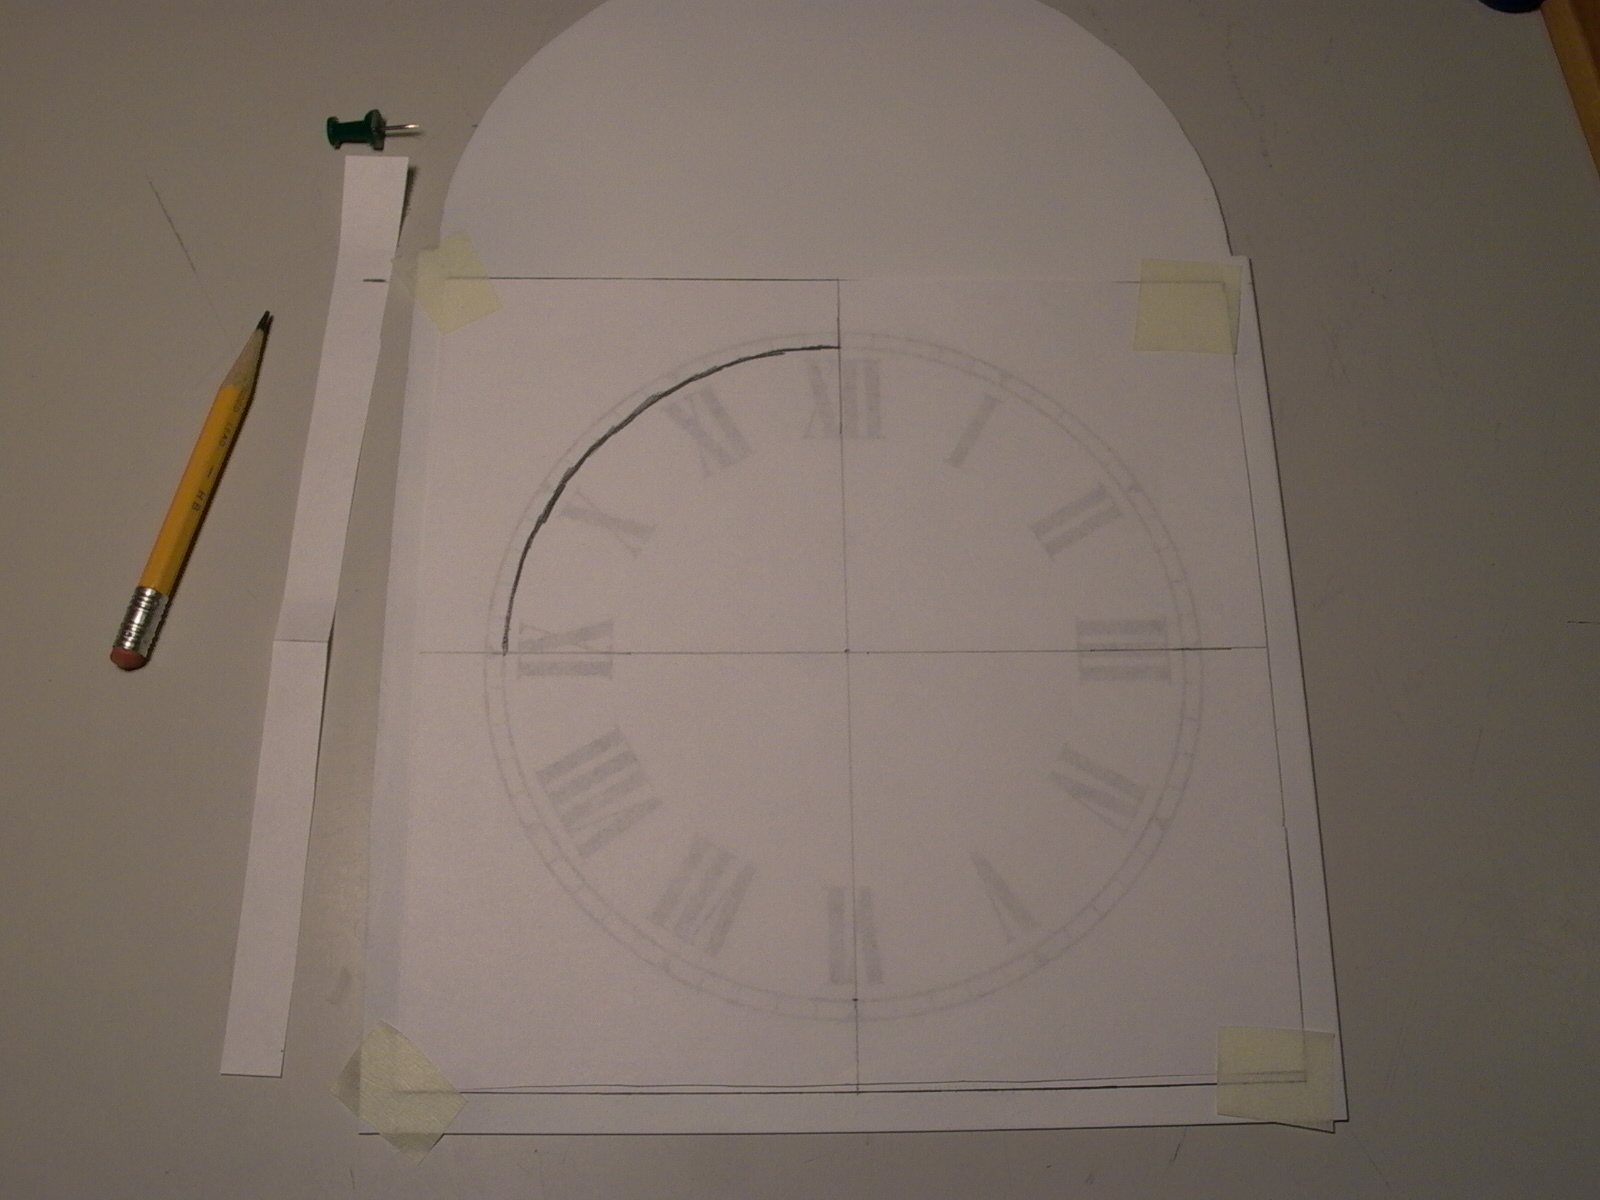
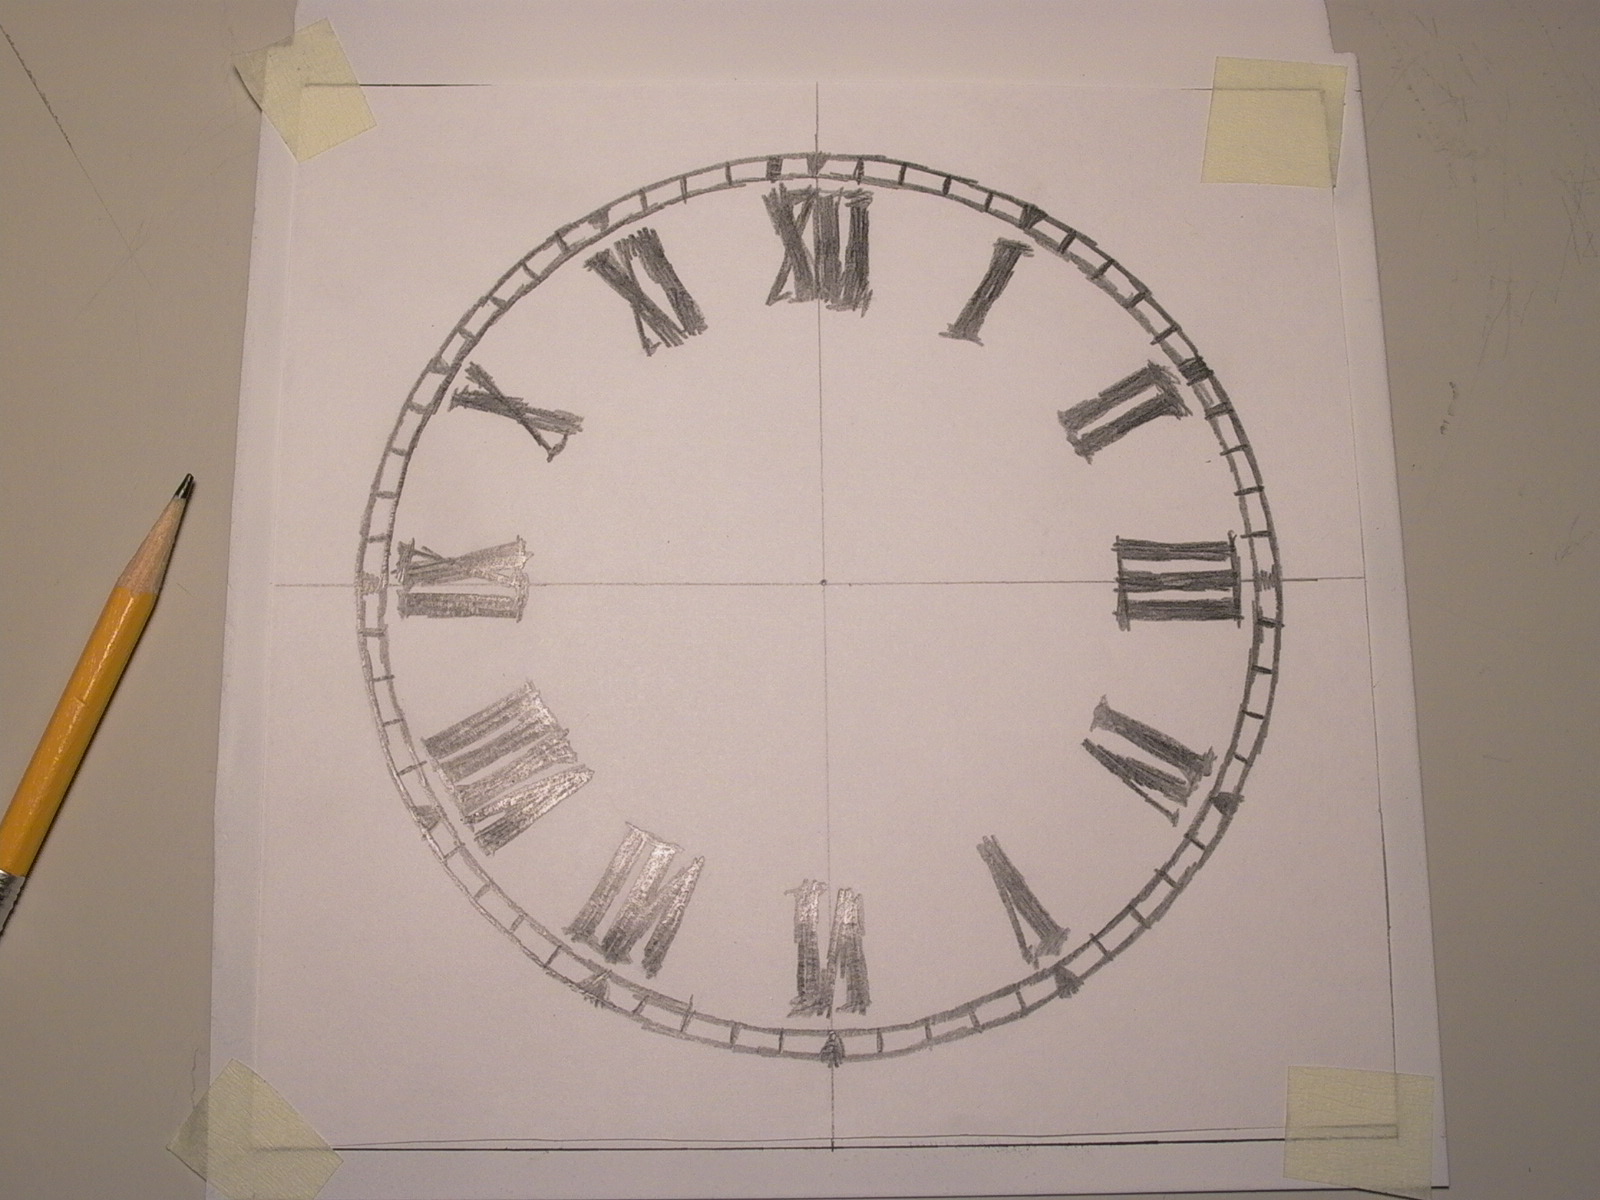
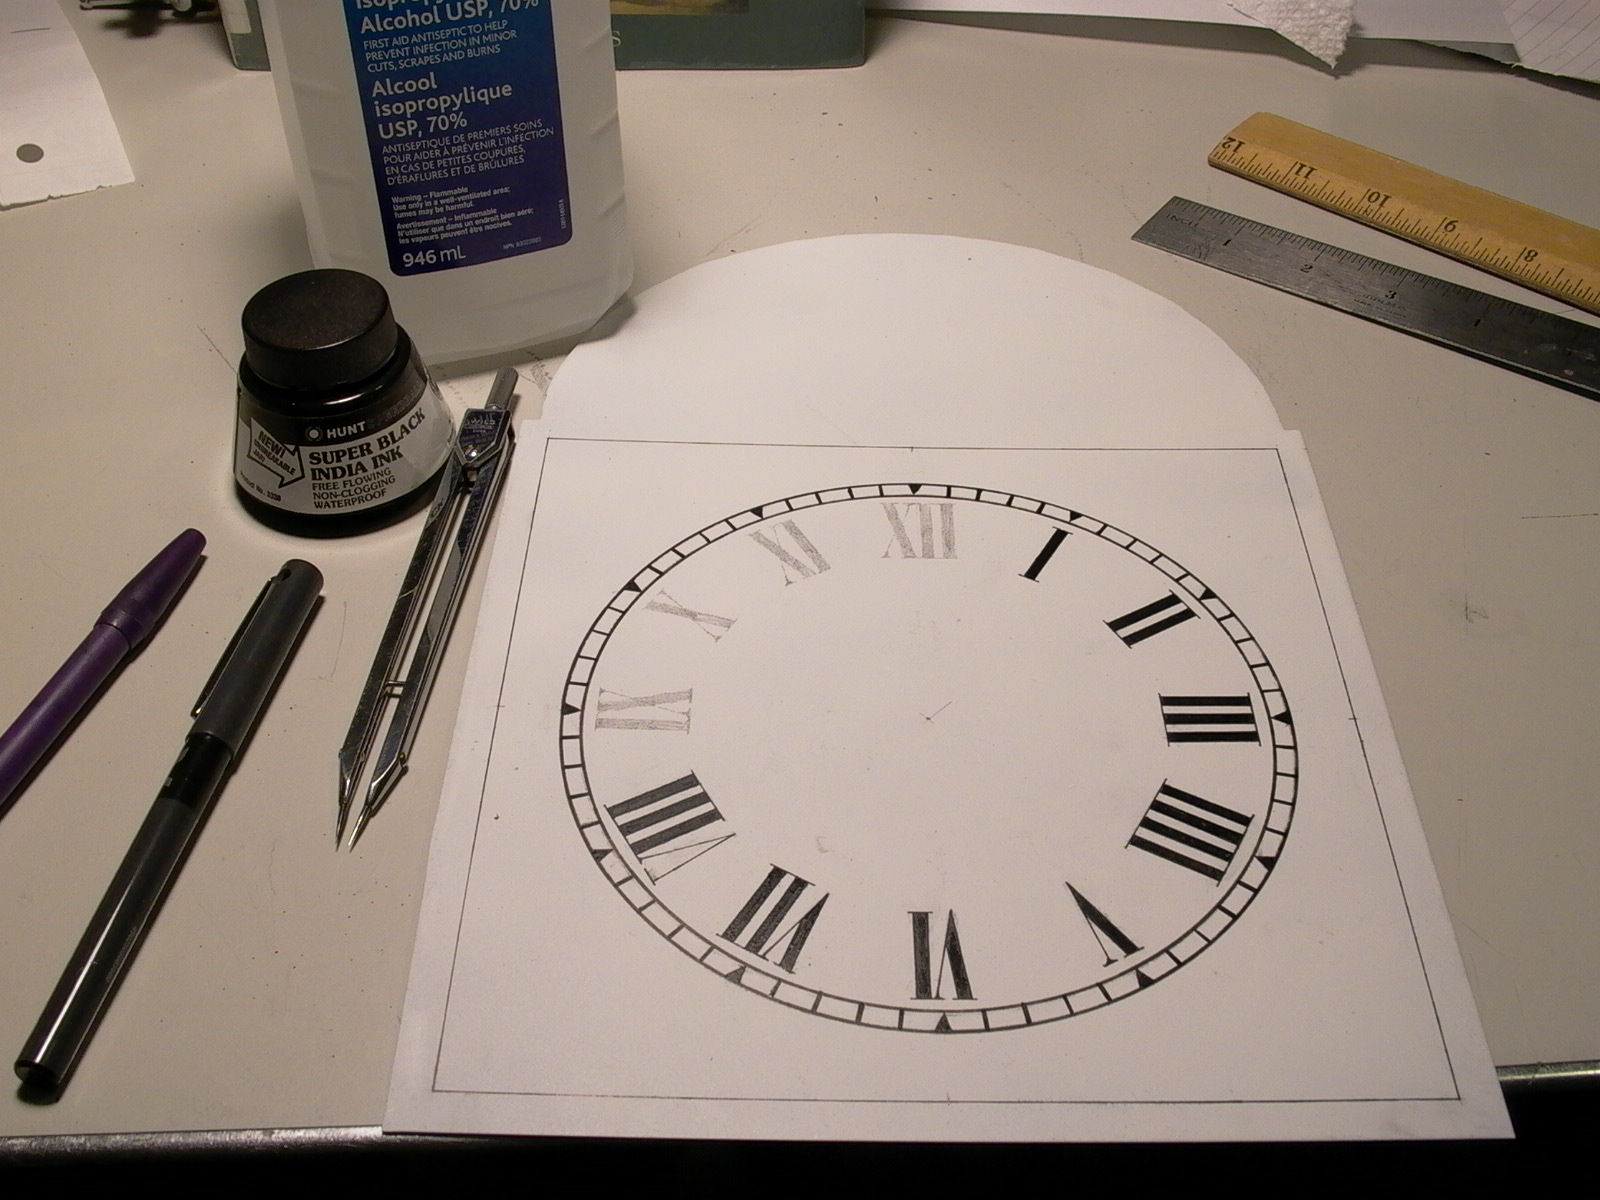
To make the dial, I did a Google image search for a Roman numeral clock face and printed out a mirror image of the dial at the required size using an ink jet printer (fig. 177). The center lines were marked on the back (fig. 178) and aligned with the center points of the four sides of the plate, making sure the intersection matched up with the center point of the dial plate (fig. 179) and then taped down. The printer ink was then scratched onto the dial plate using a pencil on the back side (fig. 180). After the sheet of paper was removed, I could see the ink was properly transferred, leaving an image of the dial (fig. 181). Using a Pilot fine tip felt pen, a border was drawn in (fig. 181) and an India ink pen was used with a compass to trace the minute tracks and outline the Roman numerals. An oil based paint pen was used to fill-in the numbers. Note the IV (4) has been changed to IIII, which is traditionally seen on clocks (fig. 182). Click here to read more about the use of IIII vs IV on clocks.
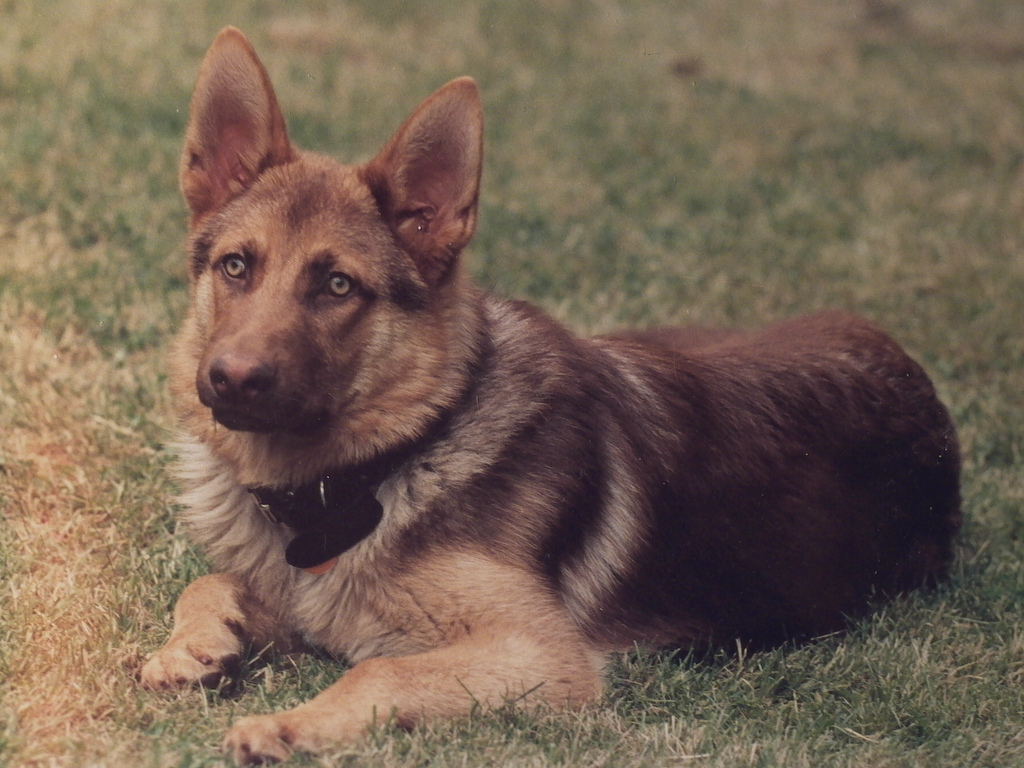
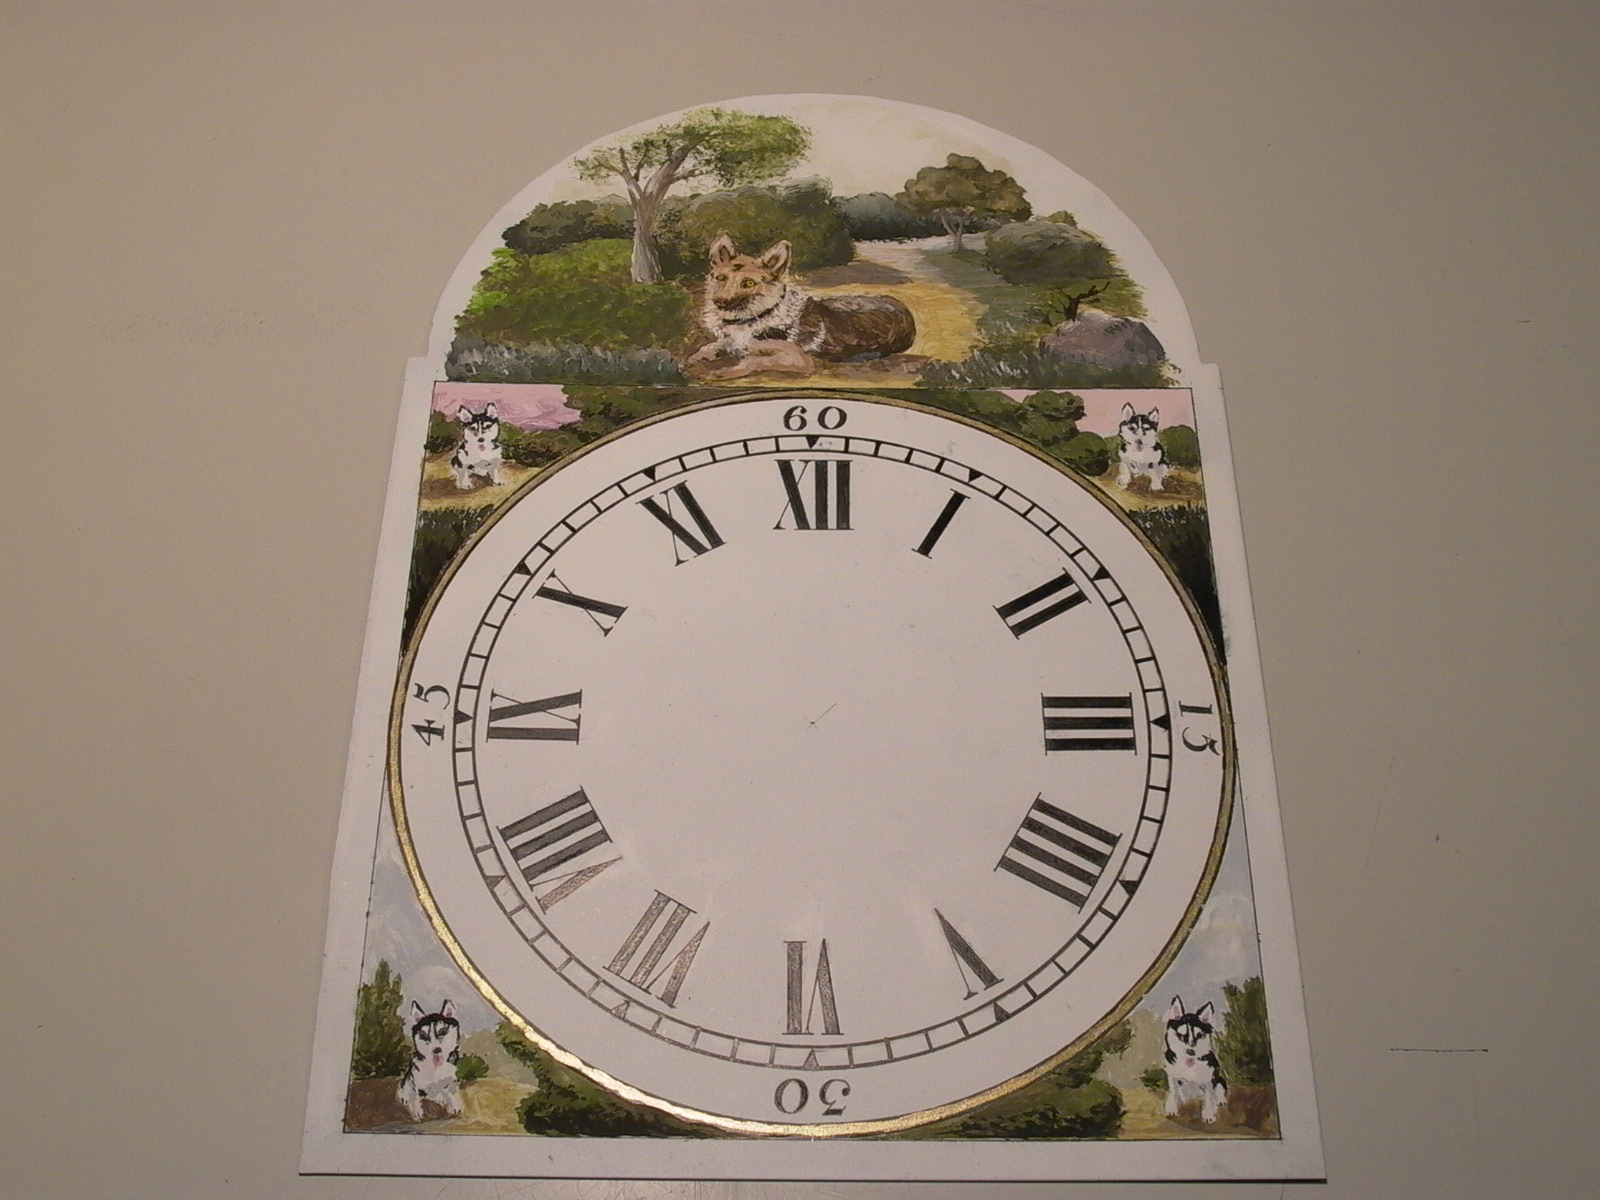
It was now time for the fun part: decorating the dial with a painted scene. Using acrylic paints from a dollar store, a picture of my German Shepherd dog (below left/fig. 183a) was painted on the arch while mirror images of my friends Siberian Husky puppy (below right/fig. 183b) adorns the four corners of the dial (below/fig. 183c). If you are not good with painting, a hack method is to transfer (scratch-on) a black and white inkjet print-out (colored ink does not transfer well) of a selected scene and fill-in the colors with paints. At this stage, you are limited by your imagination.

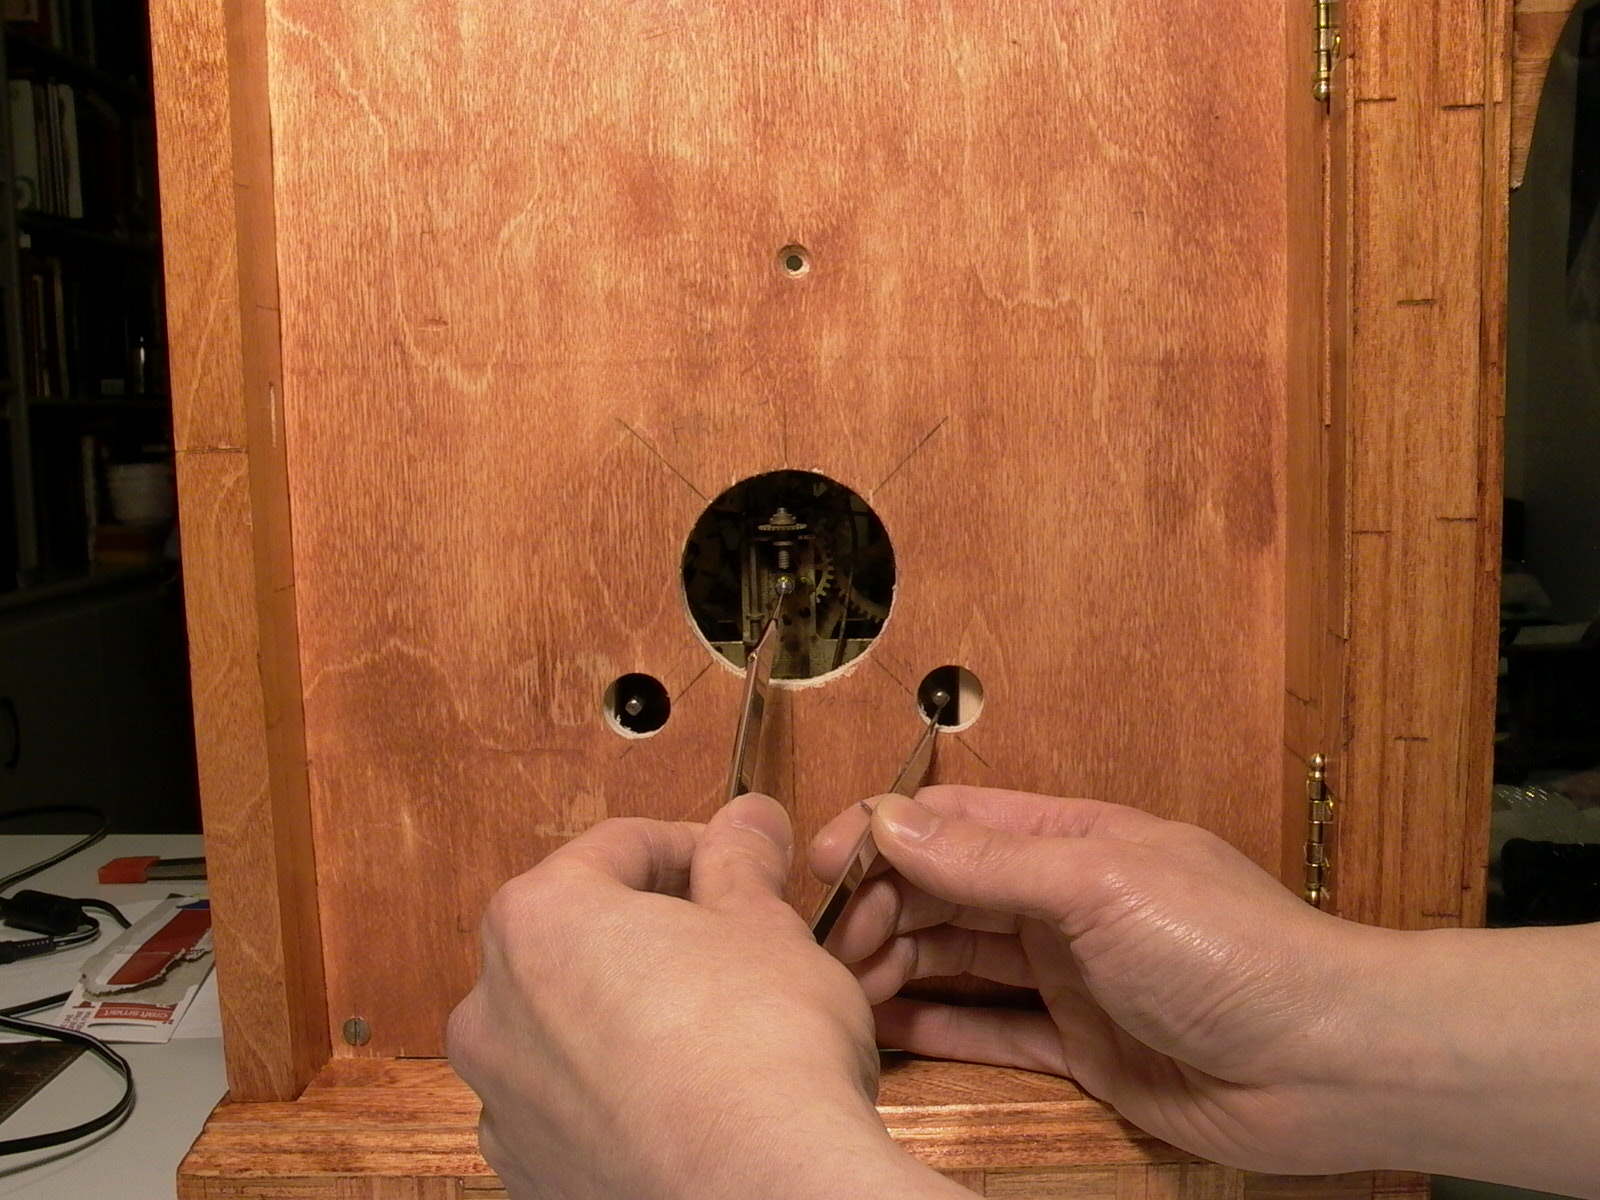
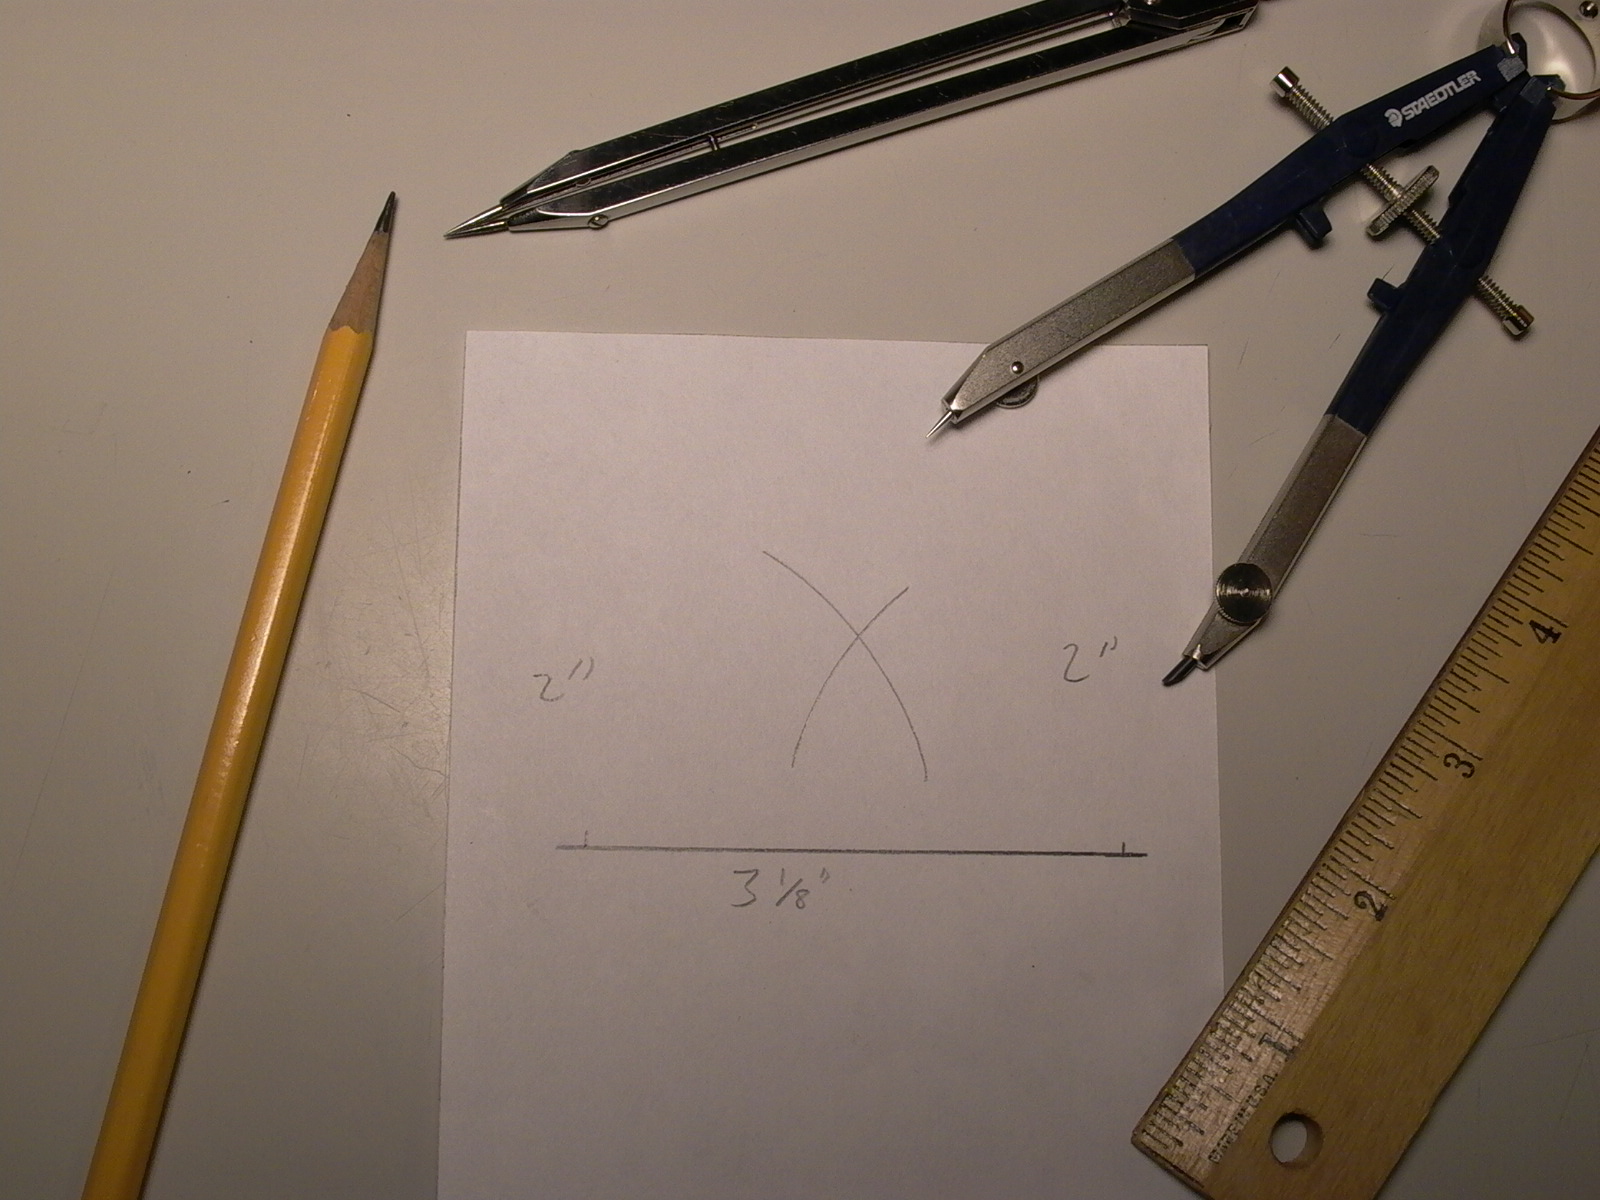
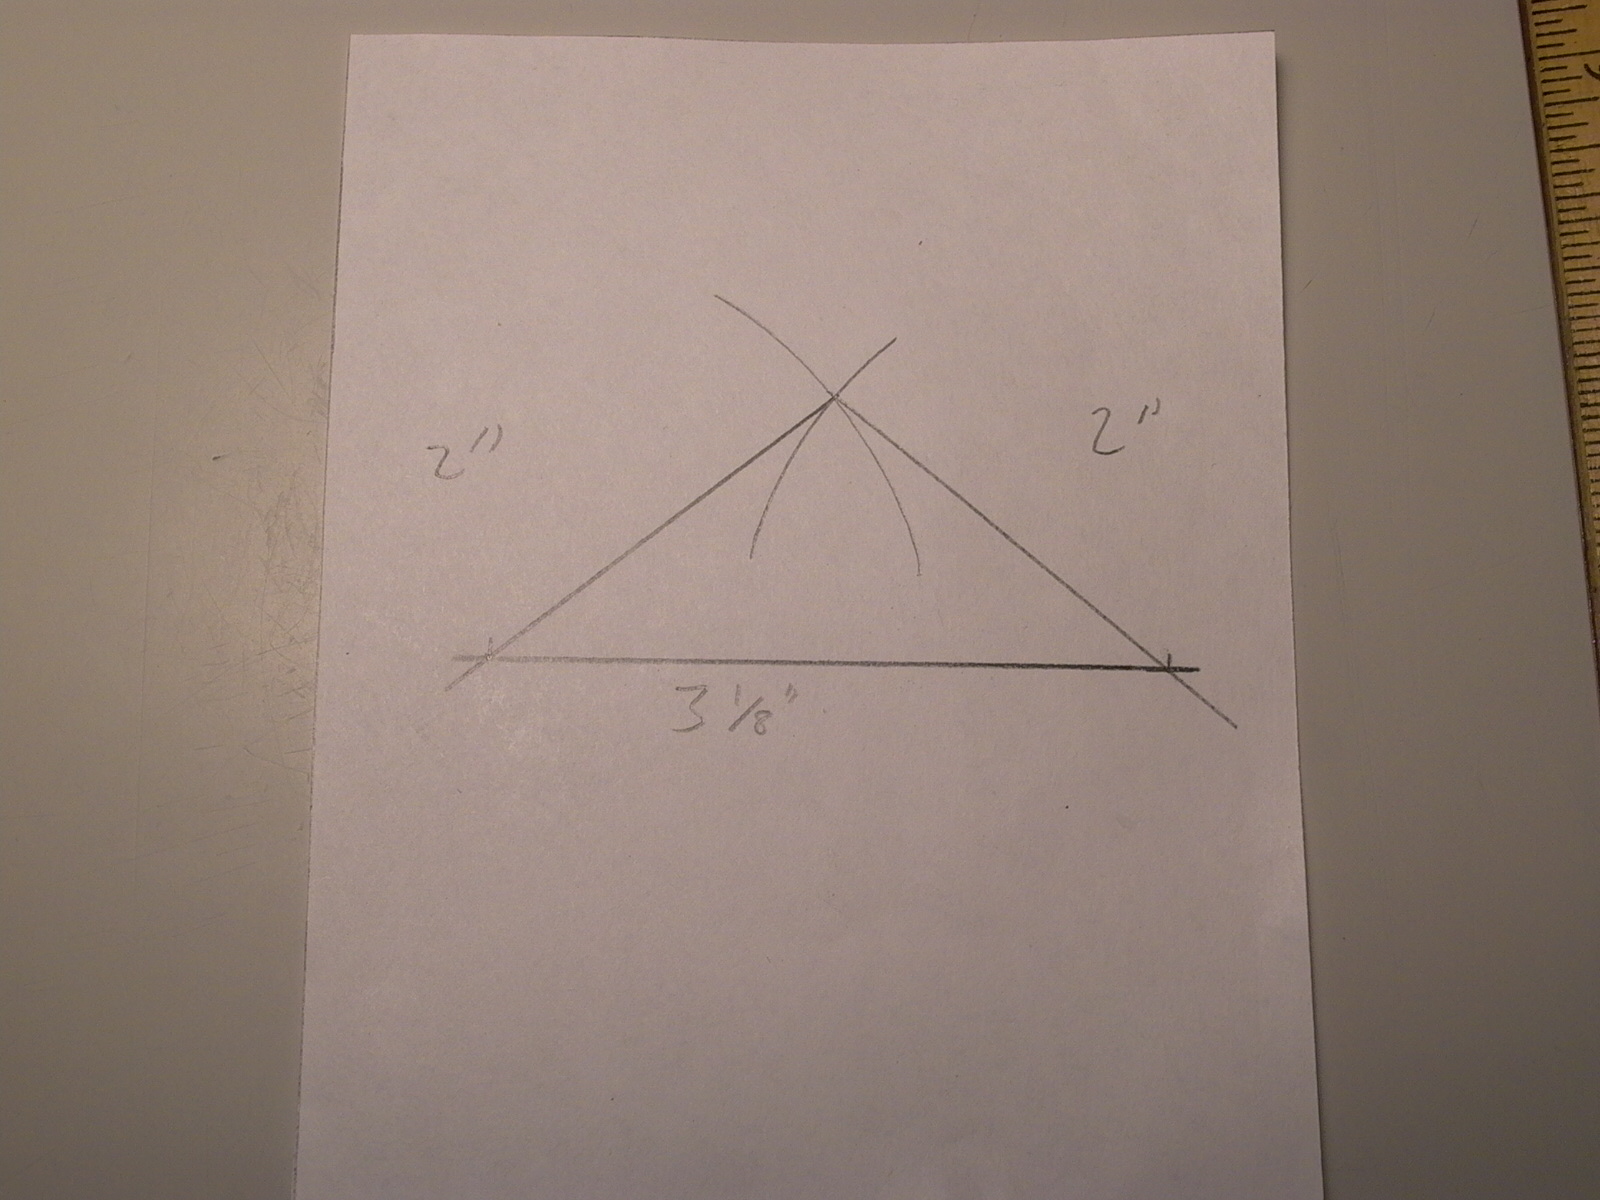
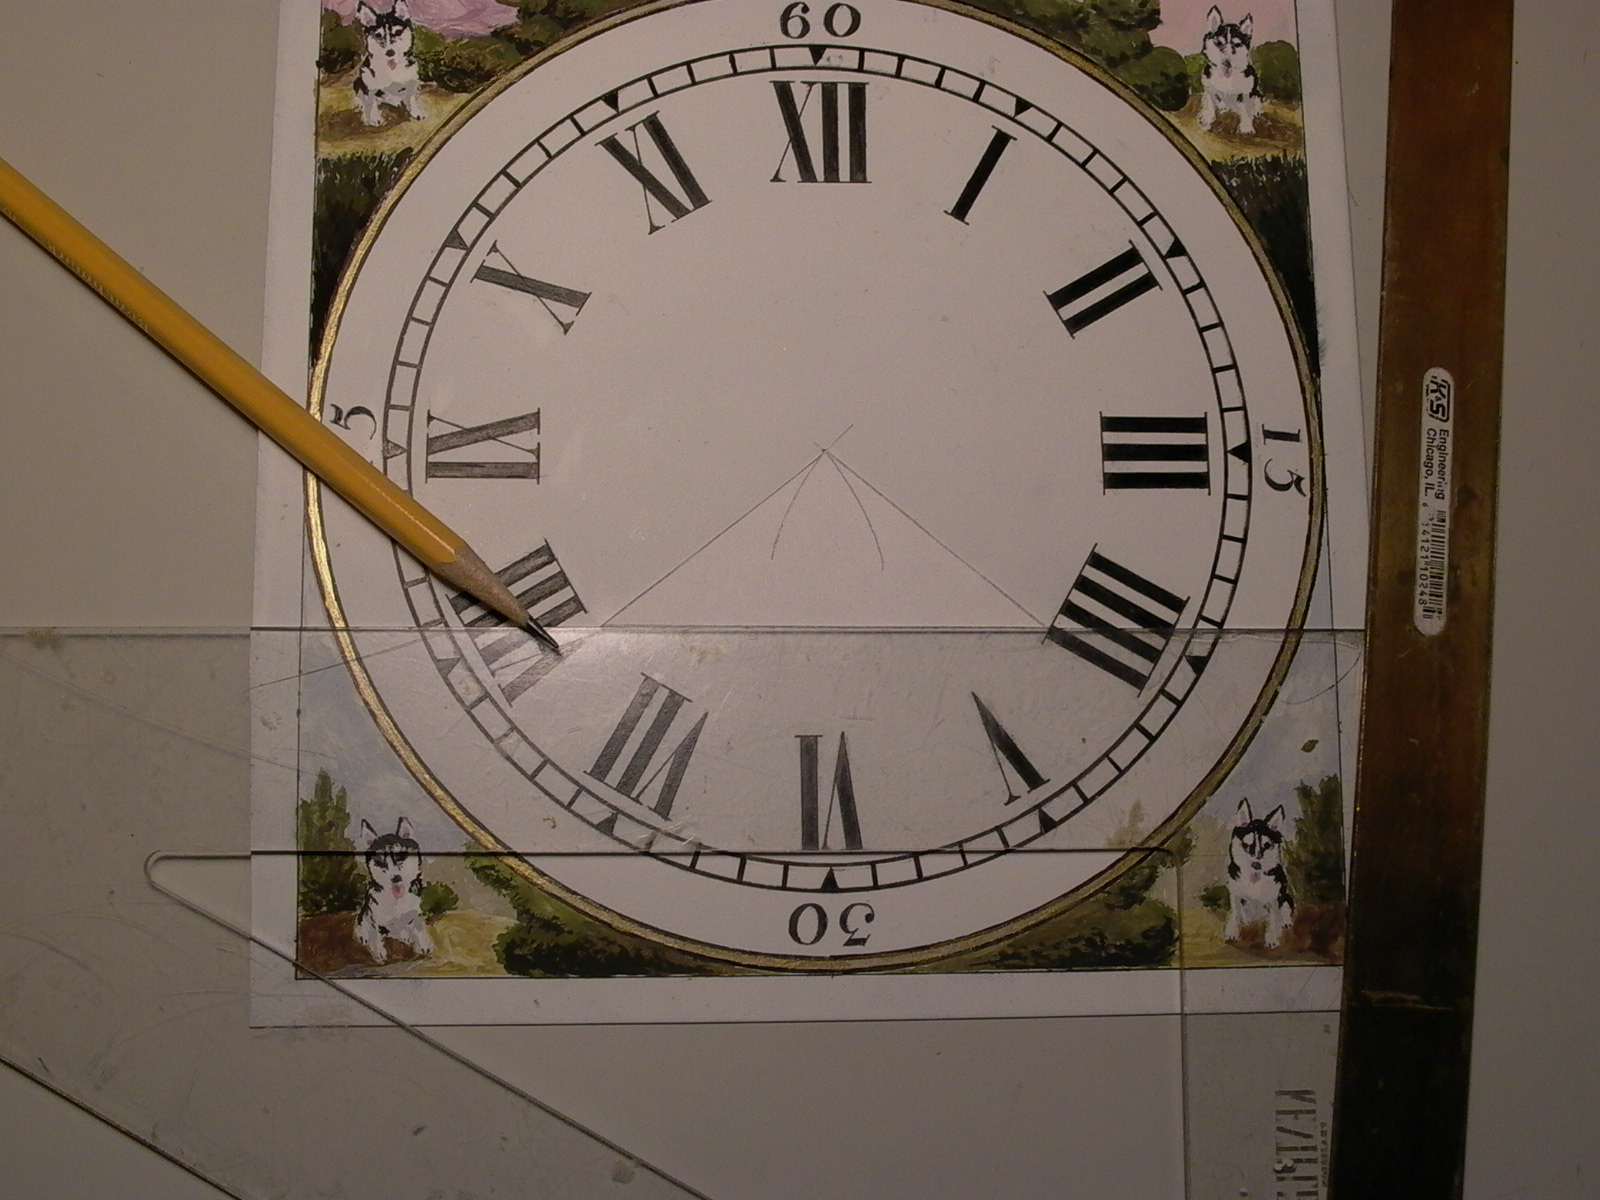
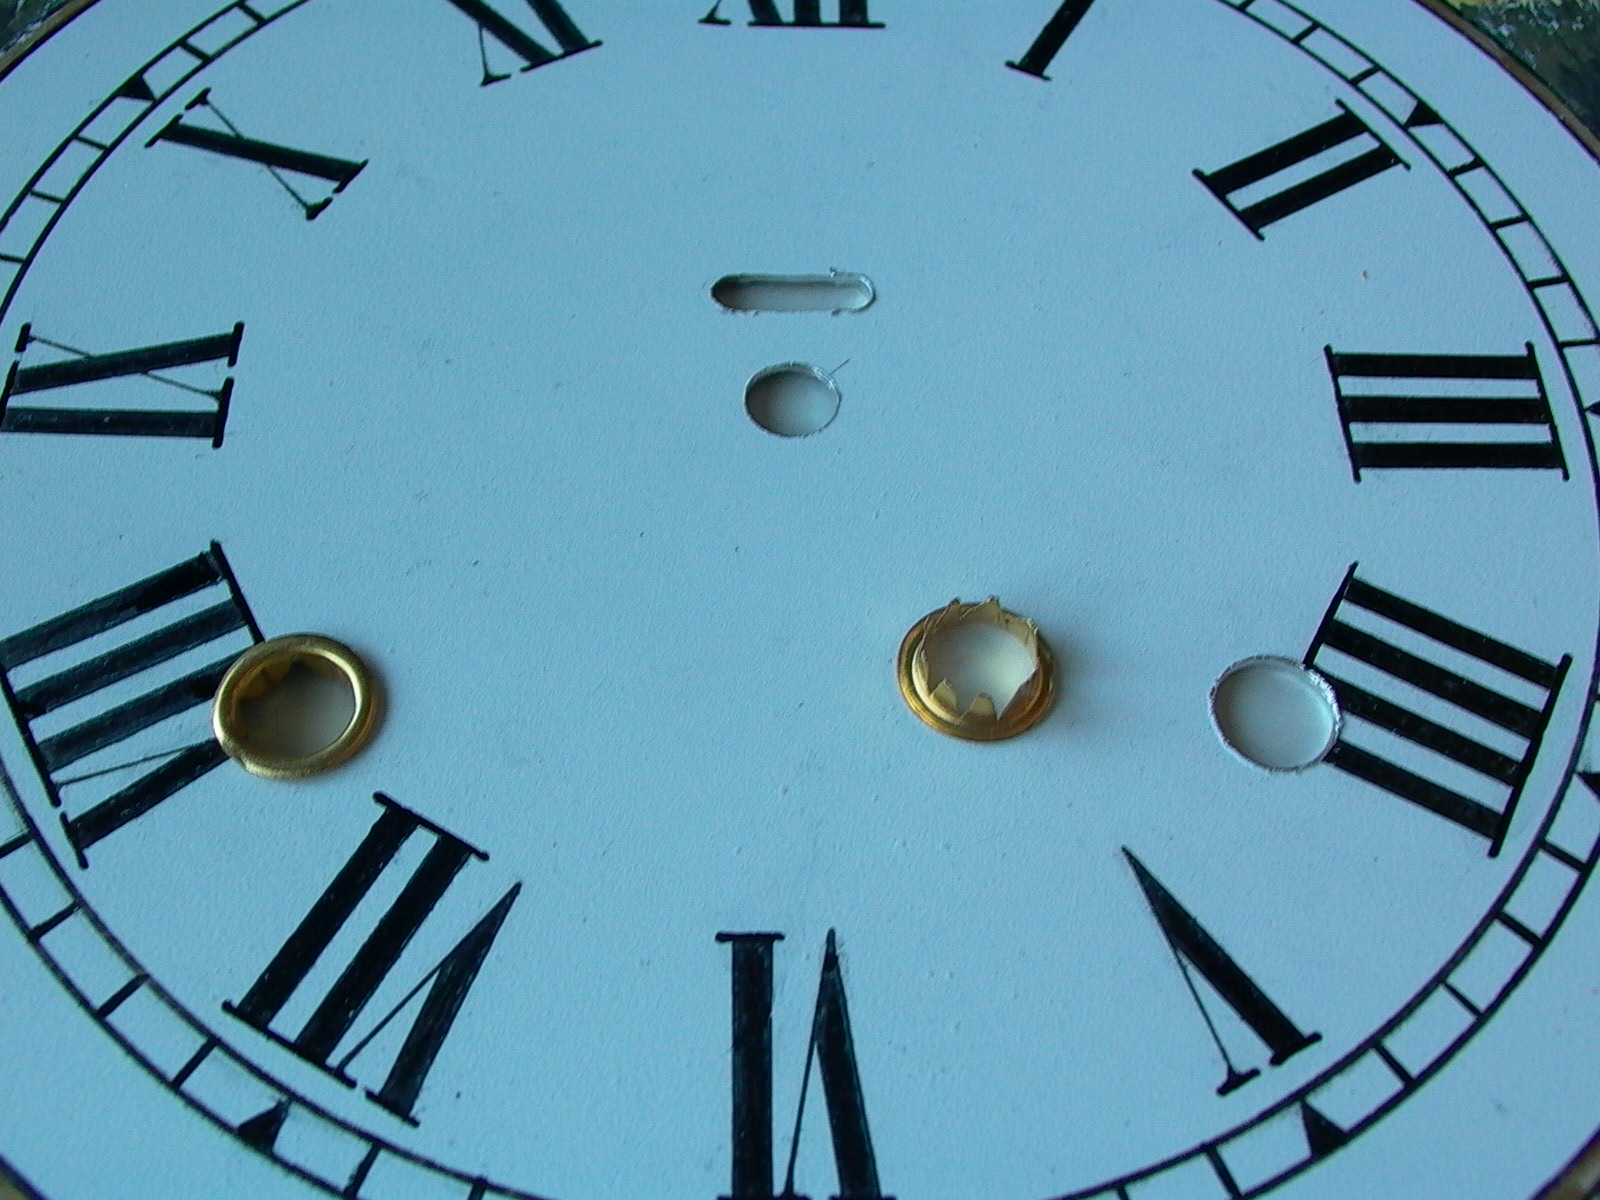
Using a divider, measurements between the center of the hand shaft and one of the winding posts, and distance between winding post centers were taken (fig. 184) and mapped on a piece of scrap paper as an isosceles triangle (fig. 185). The shape was the cut out and place on the dial so that the tip is on the center and bottom is perpendicular to the sides and parallel with the bottom (fig. 186). The bottom angle points were marked on the dial and dented, which act as a guide for drilling the winding holes (fig. 187). The nail was sharpened and with a second blow to two of the dents, a tiny hole was punched through, just small enough for a thumbtack to hold the dial in place (fig. 188).
To start drilling the holes, a starting guide hole was drilled with a fine drill, slowing working up to larger drill bits. The fine drill bit should funnel nicely in place in the dents; thus there is no reason for the drilling to be off.
Unfortunately, the largest drill bit available was smaller than the required size; so after drilling with the largest bit, a round tapered file was plugged into each of the winding holes and twisted into place (wear thick gloves to protect the palm of your hand!) until they were up to the required diameter of 1 centimeter (10mm). 10mm brass grommets were then pushed into the winding holes (fig. 189).
Scroll up to see the finished dial.